How to Choose Bikepacking Bags for Your First Overnight Ride
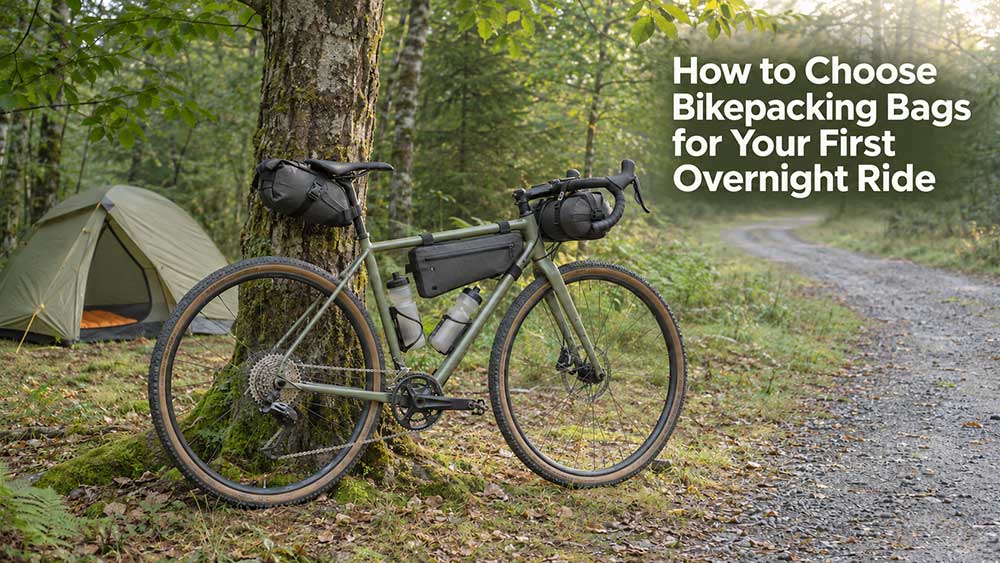
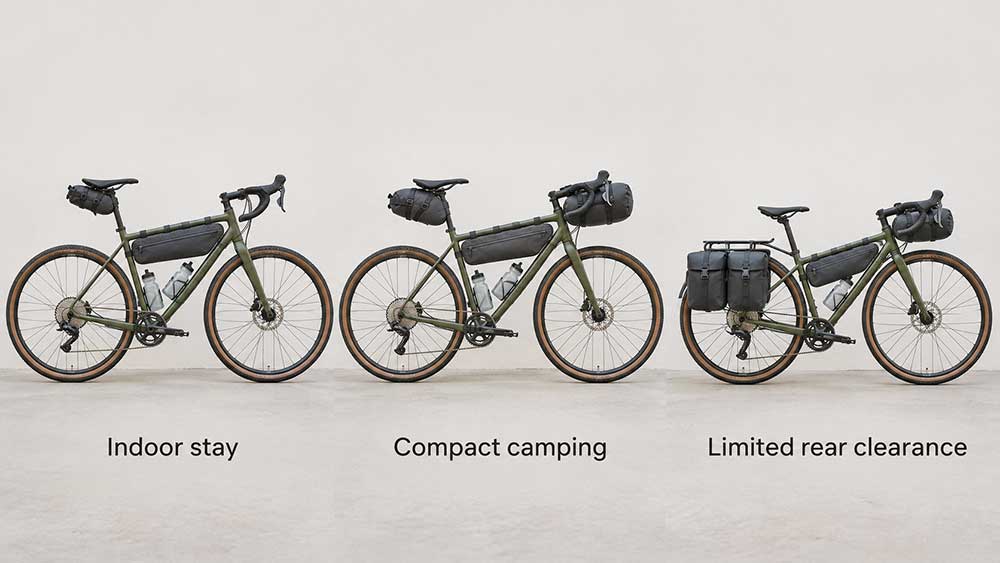
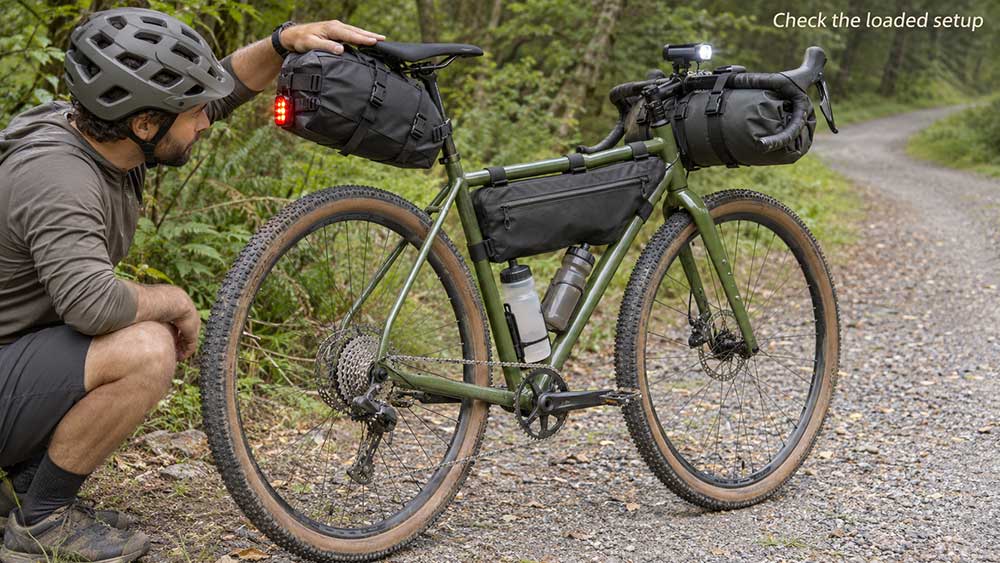
For a first overnight ride with compact camping gear, a frame bag, seat pack, and handlebar roll are a useful starting combination—provided they fit your bike. An indoor stay may require fewer bags, while bulky camping equipment or limited tire clearance may call for a rack-based option. To choose bikepacking bags, start with what you need to carry and the space available on your bicycle.
A workable setup holds your overnight equipment without interfering with pedaling, steering, braking, or water access. You do not need a bag at every mounting position.
Before comparing bags, decide what your overnight involves.
An indoor stay can remove the need for a shelter, sleeping pad, and sleeping bag. Camping requires room for those items, and a colder forecast may mean bulkier insulation. Food and water requirements depend on the distance between reliable supplies, rather than simply the number of nights away.
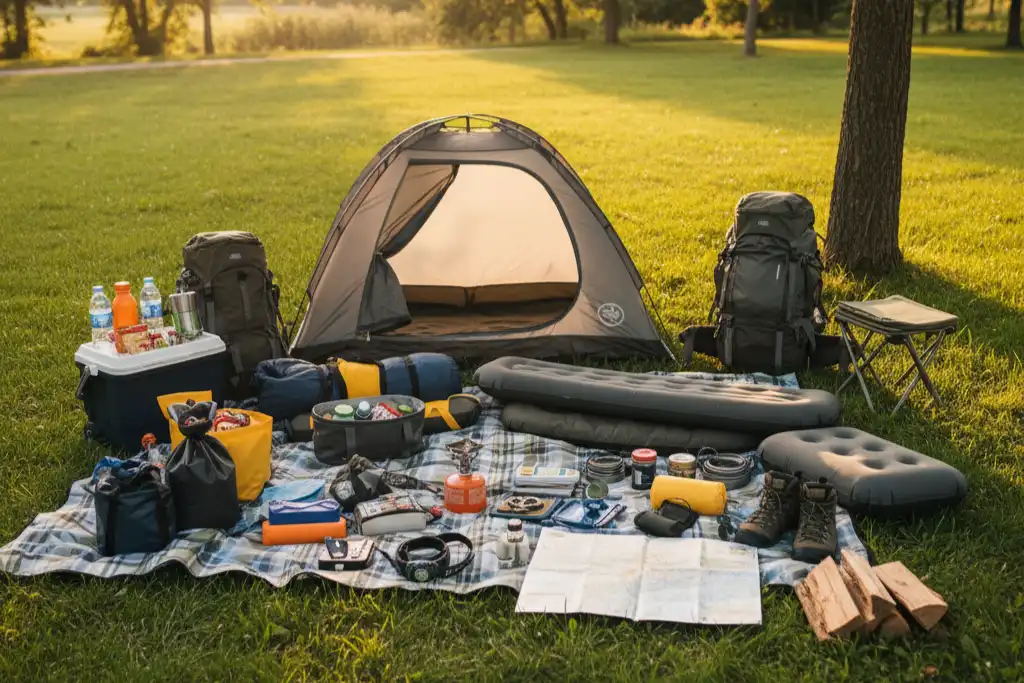
Lay out your overnight equipment alongside your normal riding essentials. Check:
Sleeping equipment: Its packed size and need for rain protection.
Shelter: Whether the fabric and poles can be carried separately if necessary.
Food and cooking equipment: Whether you will cook, buy meals, or carry ready-to-eat food.
Water: Where the containers will fit and how you will reach them.
Clothing: What the expected riding and overnight conditions require.
Use this equipment to build your first bag shortlist. Buying a complete set before checking your kit can leave you with spare capacity in one position and too little usable space elsewhere.
Check Your Bike Before Choosing Bag Sizes
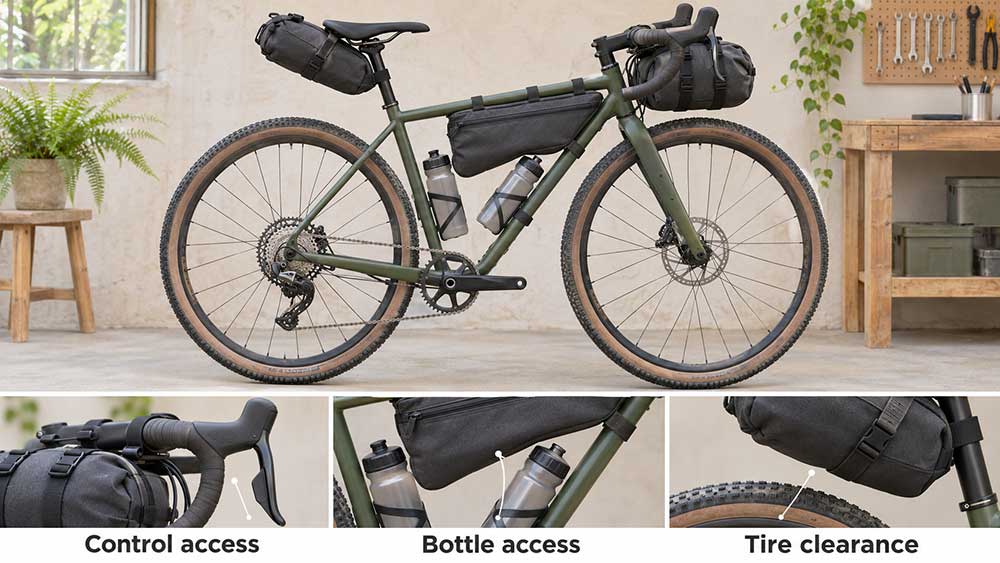
Advertised volume does not establish whether a bag fits your bicycle. Compare its shape, attachment points, and loaded dimensions with the available space.
Frame space and bottle access
Check the usable space inside your frame triangle, including cables, bottle cages, and any rear shock or moving linkage.
A half frame bag leaves part of the triangle open, but your bottles still need room to come out of their cages. Check their removal path as well as their installed position.
When comparing frame bag shapes and mounting layouts, consider loaded width too. A bag that looks suitable from the side can bulge into your pedaling space when full.
Handlebar width and front tire clearance
On a drop-bar bike, check the space between the drops and behind the brake levers. With the bag full, you should still have room for your hands and normal control operation.
Check cables, lights, and clearance above the front tire. On a suspension bike, account for the wheel moving toward the bag as the fork compresses.
Different handlebar bag designs serve different purposes. A compact zippered pouch may hold ride essentials, while a larger roll or harness may better accommodate compressible overnight equipment.
Saddle clearance and seatpost compatibility
A seat pack needs suitable attachment space at the saddle and seatpost, plus clearance above the rear tire when loaded.
Small frames, low saddle positions, rear suspension, and dropper posts can complicate the fit. Follow the specific bag’s requirements and your bicycle’s instructions. A larger seat pack adds little useful capacity if its lower edge can reach the tire.
If no suitable bag fits, change the carrying arrangement rather than forcing it into the gap.
Choose a Bag Combination That Fits Your Overnight
Use these combinations as starting points to evaluate against your equipment and bicycle.
Overnight plan or limitation
Starting combination to consider
What decides whether it works
Indoor stay with compact clothing
Seat pack and small frame bag; front storage if needed
Whether clothing, repair items, food, and water fit without overloading one position
Mild-weather camping with compact equipment
Frame bag, seat pack, and handlebar roll
Whether sleeping equipment and shelter fit within the available mounting space
Small frame or limited saddle-to-tire space
Suitable frame bag, front storage, and compatible rack-based rear storage
Rack compatibility, loaded clearance, and relevant load limits
Rough route with a dropper post or rear suspension
Frame bag, compatible front storage, and a rear system suited to the bike
Clearance through the intended suspension and seatpost movement
Bulky camping equipment or substantial food requirements
Frame storage and a compatible rack with panniers or a secured rack-top bag
Cargo volume, route width, mounting compatibility, and load ratings
Choosing between bikepacking bags and panniers depends on your route, equipment bulk, and available mounting points. If you already own a suitable rack and panniers, try them before buying a new system.
Add an accessory bag when it solves a specific access problem. A stem bag can separate snacks from overnight equipment, for example. Check that it works alongside the rest of the cockpit luggage without obstructing your knees or steering.
Handlebar bag vs. frame bag: what changes your choice?
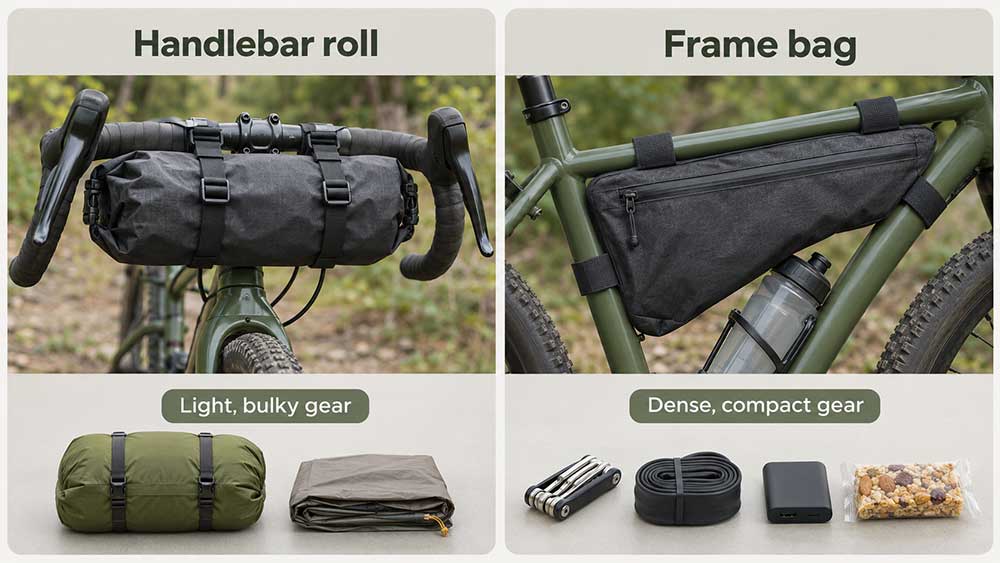
These bags complement each other because their shapes and mounting positions suit different loads.
Question
Handlebar roll or harness
Frame bag
What equipment is a useful starting match?
Bulky, relatively light items, such as a compressed sleeping bag or shelter fabric
Dense, compact items, such as tools, food, and a power bank
What limits usable space?
Bar width, controls, cables, and front tire clearance
Triangle shape, bottle access, loaded width, and suspension layout
How convenient is access?
A tightly closed roll can be inconvenient to open during the day
Side access can make small items easier to retrieve when stopped
What should prompt a different choice?
The load crowds your hands, restricts controls, or makes steering difficult
The bag obstructs bottles, moving parts, or pedaling
Do not transfer all your dense equipment to the handlebar bag simply because the frame bag is full. Reconsider the combination or remove unnecessary equipment before increasing the front load.
Choose Usable Capacity, Not Just a Total Liter Figure
Published ranges help you understand the options. They do not establish a universal overnight requirement.
Compare with your compressible equipment and the bag’s loaded clearance requirements
Frame pack volume in BIKEPACKING.com’s guide
About 3–9 L, spanning an extra-small half bag to an extra-large full bag
Recognize that the range covers different frame sizes and bag formats
Half frame bag height described by BIKEPACKING.com
About 10–20 cm (4–8 in)
Check bottle access against the actual outline; this is bag height, not required clearance
These ranges describe options covered by the guides, rather than minimum purchases or limits for every product.
Bags with equal listed capacities can accommodate equipment differently. Long tent poles may not fit a short compartment. A handlebar roll may need to close shorter to fit between drop bars, reducing usable volume.
Before choosing your combination, check that:
Your largest items fit through the openings and inside the compartments.
Roll-top closures close as instructed.
Zippers close without forcing the bag sides together.
Loaded bags retain the shape and clearance your bike needs.
Food and clothing needed during the ride remain accessible.
If the kit only fits with strained closures or bags pressed against nearby components, revise the setup.
Compare Weather Protection, Weight, and Construction
Once a bag fits, compare how its complete construction matches the ride.
Weather protection: Check the finished bag’s stated protection, including seams and closures. Waterproof fabric alone does not establish whole-bag waterproofing. Where necessary, use a suitable internal dry bag or liner for equipment that must stay dry.
Weight: Compare the complete carrying system, including required harnesses, brackets, racks, and liners. A lighter bag body may need additional parts before it can carry your equipment.
Construction: Inspect attachment points, adjustment range, contact areas, and replacement options for straps or hardware. A fabric name alone does not establish the durability of the finished bag.
Use at camp: Consider how the bag comes off the bike and opens. A removable dry bag may be convenient if you want to leave the harness attached.
Test the Complete Setup Before Leaving
Load the bags with the equipment, food, and water you expect to carry. An empty fitting cannot reveal every problem caused by a full bag.
Before the test ride, pack your bikepacking bags according to item weight, shape, and how often you need access.
Following the bicycle and luggage manufacturers’ instructions, check that:
Bags and strap ends stay clear of wheels and drivetrain components.
Steering and brake controls operate normally.
You can pedal without persistent contact with the luggage.
Bottles can be removed and returned.
Clearance remains through the intended suspension and dropper-post movement.
Lights remain usable and visible.
Take a short local ride that includes turning, braking, climbing, and a surface similar to your planned route. Stop to inspect movement, sagging, and rubbing.
Let the results guide your adjustments. A front roll that interferes with controls needs a different size or mounting arrangement. A seat pack that cannot maintain tire clearance needs another rear-storage solution.
For your first overnight, buy or borrow bags that solve those specific needs. Add more when the loaded setup shows a clear reason.
FAQ
Do all my bikepacking bags need to be from the same brand?
No. Check each bag’s fit and how adjacent bags interact. A matching set can still create conflicts around straps, bottle access, or handlebar space.
Can I use a backpack for equipment that will not fit on the bike?
A backpack can be part of the setup, particularly if you already use one comfortably. Test it with the intended load. If it becomes uncomfortable or restricts movement, reconsider the equipment or carrying arrangement.
Is one large seat pack enough for an overnight?
It can be, if your equipment is compact, the bag fits, and your food, water, and riding essentials have suitable places. An indoor stay makes this more plausible than camping with bulky sleeping equipment.
Should I buy custom bags for my first trip?
You do not need to start with custom bags. They may help when an unusual frame shape leaves substantial space unused or standard bags cannot fit well. First establish the bicycle and carrying needs you expect to keep.
Can I mix panniers with a handlebar roll and frame bag?
Yes, provided the complete arrangement suits the bike and route. Check mounting, heel clearance, overall width, and the relevant load limits.
Can I reuse my first overnight setup for a longer trip?
Possibly. Sleeping equipment may stay the same, while food, water, clothing, charging, and repair requirements change. Reassess the longest distance between reliable supplies before assuming you need either the same capacity or a larger set.





Comments are closed