



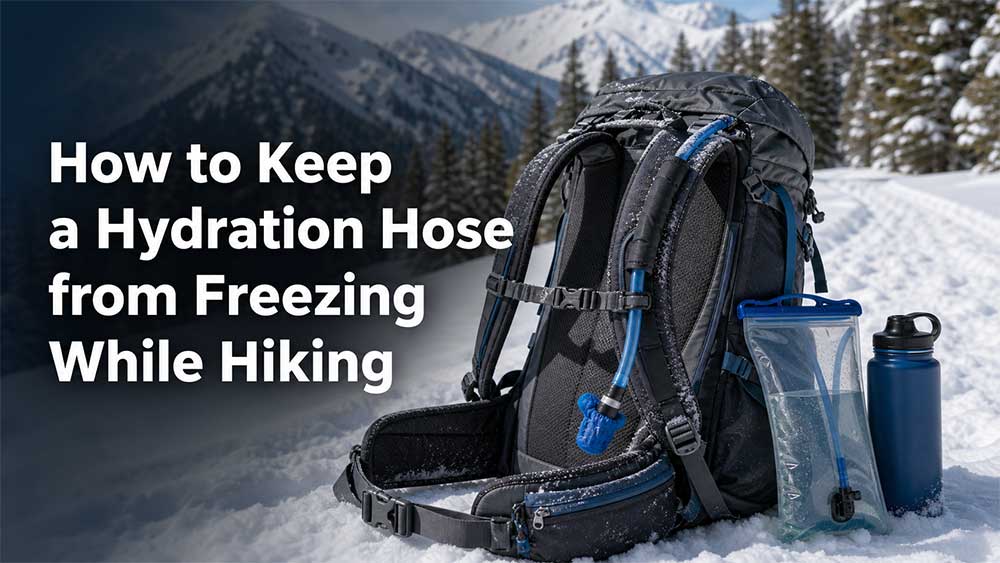
How to Keep a Hydration Hose from Freezing While Hiking
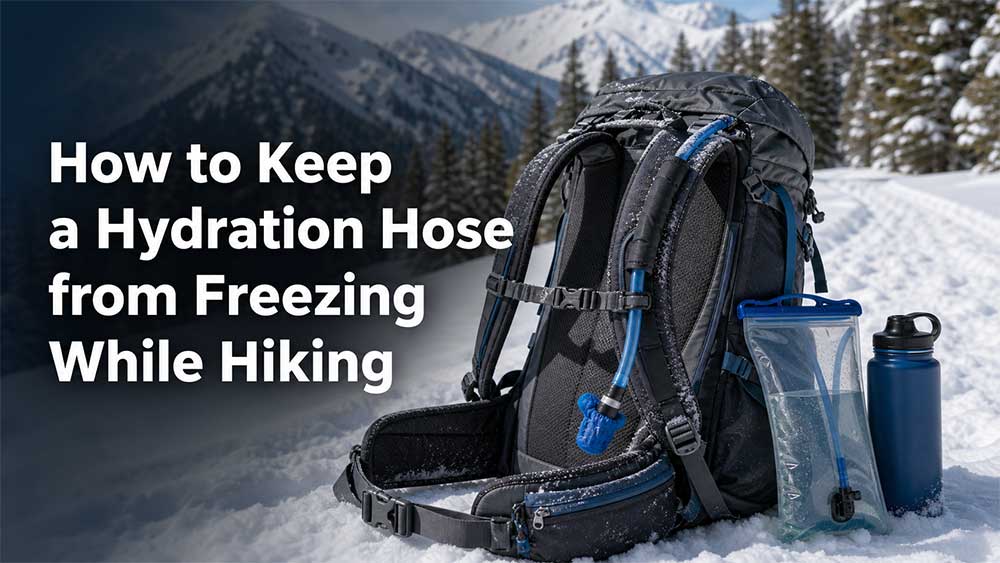
A hydration hose can freeze surprisingly quickly during a winter hike—even when the water inside the reservoir is still liquid. The narrow tube, exposed bite valve, cold wind, and small amount of water left in the hose all make it more vulnerable than the reservoir itself.
The most reliable way to reduce freezing is to combine several precautions: start with warm water, insulate the hose and bite valve, drink regularly, blow the remaining water back into the reservoir after every drink, and keep exposed parts out of the wind.
No hydration system is completely freeze-proof. Temperature, wind, exposure time, rest periods, and pack design all affect how quickly ice forms. When hiking below freezing, always carry a wide-mouth bottle or insulated container as a backup water source.
Why Does the Hydration Hose Freeze Before the Reservoir?
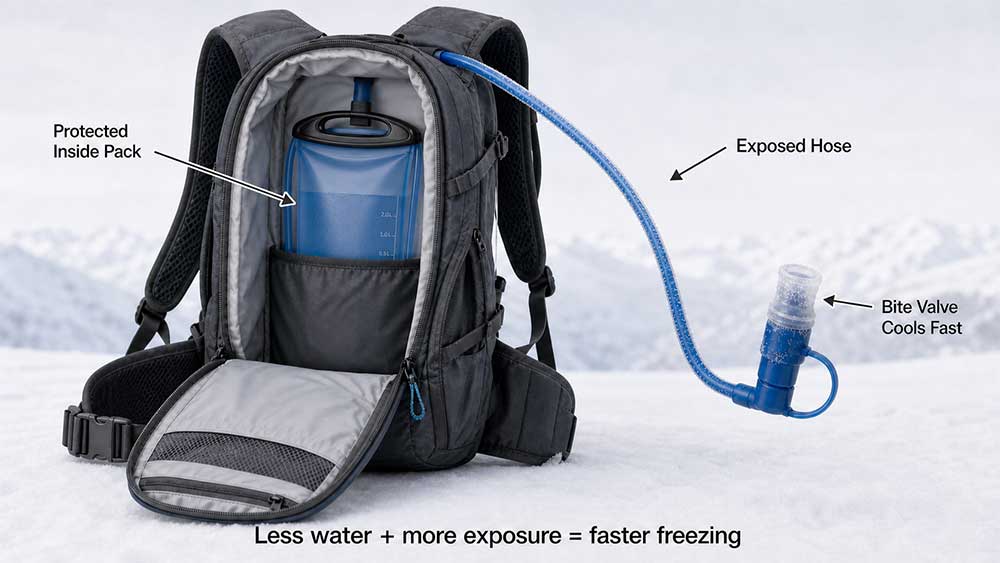
A hydration reservoir may hold one to three liters of water, while the hose contains only a small amount. That smaller volume loses heat much faster.
The hose also has a relatively large exposed surface area compared with the water inside it. If it runs along the outside of a shoulder strap, cold air and wind can continuously draw heat away. The bite valve is even more vulnerable because its narrow internal passages can trap droplets after each drink.
The reservoir usually freezes more slowly because it:
- Holds a larger volume of water
- Sits inside the backpack
- Stays closer to the hiker’s body
- Receives some insulation from clothing and other gear
- Is less exposed to wind
That is why a reservoir may still contain liquid water while the hose or bite valve is already blocked.
Prepare the System Before You Leave
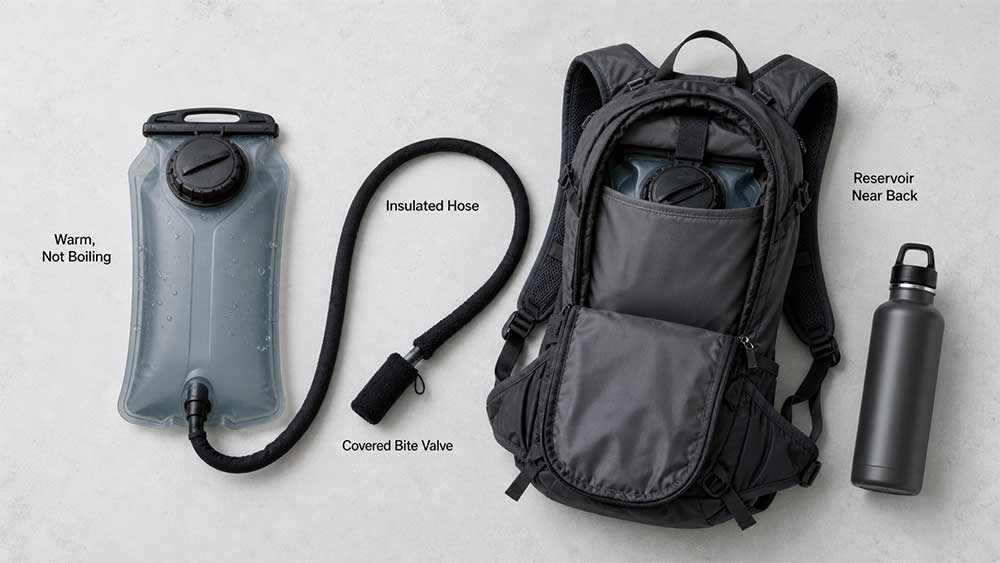
Cold-weather hydration problems are easier to prevent at home than to fix on an exposed trail. Clean, assemble, fill, and test the entire system before leaving.
Check the Reservoir, Hose, and Bite Valve
Fill the reservoir and check the closure, hose connection, shutoff valve, and bite valve. Make sure water flows normally and that the hose is not twisted, pinched, or partly blocked.
A bent tube or poorly connected fitting can feel similar to an ice blockage. Testing the system beforehand helps you tell the difference.
If the reservoir has been stored for a while, make sure the hydration bladder is clean and ready to use before filling it.
Start with Warm Water, Not Boiling Water
Warm water takes longer to cool to the freezing point and can give the system more usable time in cold conditions.
CamelBak’s cold-weather care and use guidance recommends warm rather than boiling water. Excessive heat can damage certain reservoir films, hoses, seals, or welded areas.
Always check the temperature limits provided by the manufacturer. A reservoir that can safely hold warm water is not necessarily designed for boiling water.
Insulate Both the Hose and Bite Valve
A hose sleeve creates a barrier between the tube and cold air. It will not stop freezing indefinitely, but it can slow heat loss between drinks.
Cover as much of the exposed hose as possible. A short unprotected section may still become the first place where ice forms.
The bite valve also needs protection. A basic dust cap may keep the valve clean, but it usually provides little insulation. A cold-weather setup may use an insulated valve cover, a zippered shoulder-strap channel, or a protected pocket near the chest.
For example, the HydraPak ArcticFusion insulated tube uses foam insulation to reduce heat loss in cold conditions. This construction can lower the risk of freezing, but “insulated” should not be interpreted as completely freeze-proof.
Keep the Reservoir Close to Your Back
Place the reservoir in the hydration compartment closest to your back rather than in an exposed outer pocket. Body heat and the surrounding pack materials can slow cooling.
During rest stops, avoid leaving the backpack directly on snow or frozen ground for long periods. Once the pack is no longer against your body, the reservoir loses that source of warmth.
What to Do While Hiking
Equipment helps, but what you do after each drink often matters more. An insulated hose can still freeze if water remains motionless inside it.
Drink Small Amounts Regularly
Do not wait until you are noticeably thirsty. Drinking small amounts at regular intervals helps you:
- Notice increasing resistance before the hose freezes completely
- Prevent water from sitting in the hose for long periods
- Maintain hydration when cold weather suppresses thirst
- Repeat the blowback routine throughout the hike
Briefly moving water through the tube is not enough by itself. The important step is clearing the hose after drinking.
Blow the Water Back After Every Drink
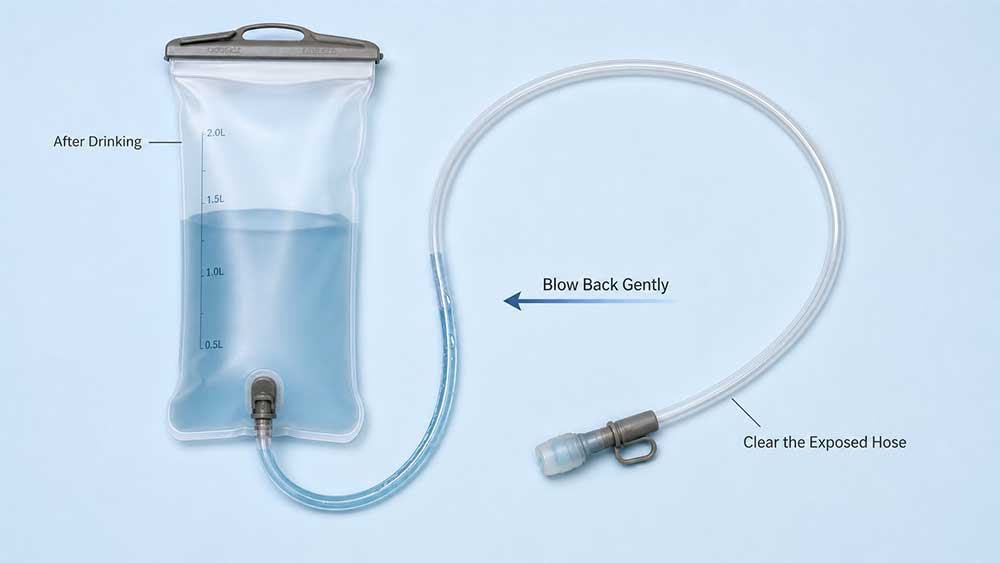
Removing standing water from the hose is one of the most effective ways to reduce ice blockages.
After drinking:
- Release the bite valve.
- Blow gently into the hose.
- Continue until the water returns to the reservoir.
- Check for visible water near the bite valve.
- Put the hose and valve back in a protected position.
The goal is not simply to make bubbles in the reservoir. Try to clear as much water as possible from the exposed part of the tube.
Some systems are easier to blow back than others. Test yours before the hike, and never force air through a closed valve, damaged fitting, or known blockage.
Keep the Hose Out of the Wind
Wind speeds up heat loss. A loose hose swinging outside the pack will usually cool faster than one protected by a shoulder-strap channel or jacket.
Depending on your clothing and pack design, you can:
- Route the hose through an insulated shoulder channel
- Tuck the exposed section inside your jacket
- Store the bite valve in a chest pocket
- Secure loose tubing to the shoulder strap
- Move the valve into an insulated layer during long stops
Make sure the hose is not sharply bent or compressed. A kink can interrupt water flow even when no ice is present.
Protect the Bite Valve During Stops
The bite valve often freezes first because small droplets remain in its narrow passages. After blowing the water back, remove visible moisture and place the valve inside an insulated cover, shoulder-strap channel, or protected pocket.
If you tuck it inside your clothing, make sure it will not leak onto your base layers. Wet clothing creates a separate problem in freezing conditions.
Can Insulation Completely Prevent Freezing?
No. Insulation slows heat loss, but its performance depends on:
- Air temperature
- Wind speed
- Length of exposed tubing
- Insulation thickness and coverage
- Starting water temperature
- Time between drinks
- Length of rest stops
- Water remaining in the hose
- Bite-valve protection
A system that works well during steady movement in mildly freezing weather may still freeze during a long, windy rest stop.
A more reliable approach is to combine insulation with regular drinking, hose blowback, bite-valve protection, reduced wind exposure, and a separate backup bottle.
Can Electrolytes or Sugar Keep the Hose from Freezing?
Electrolytes and sugar can slightly change the freezing point of water, but ordinary drink concentrations should not be treated as dependable freeze protection.
Flavored drinks also leave more residue than plain water. The reservoir, hose, and bite valve therefore need prompt and thorough cleaning after use.
Use electrolyte drinks according to your hydration and nutrition needs—not as a substitute for insulation, blowback, protected hose routing, or a backup water source. Adding excessive salt is not a safe or practical antifreeze method.
What Should You Do If the Hose Is Already Frozen?
Act as soon as the flow becomes restricted. A partially frozen valve or tube is usually easier to restore than a completely solid blockage.
Warm the Hose Gradually
Tuck the hose and bite valve inside your jacket and let body heat thaw the blockage gradually. Keep the tube in its natural shape and avoid folding or crushing it, as some materials become stiffer in low temperatures.
You can also use gloved hands, a warm cloth, or warm water if the material allows it. Concentrate first on the bite valve and the most exposed section of the hose.
Do not:
- Use an open flame
- Place the hose next to a stove
- Pour boiling water over unknown materials
- Bite forcefully on a frozen valve
- Strike or sharply bend stiff tubing
- Apply excessive force to plastic fittings
Sudden heat and rough handling can damage the hose, valve, seals, or connectors.
Switch to Your Backup Water
If the hose does not thaw quickly, stop relying on it and use your backup container. Hydration is a safety issue, and standing in the cold while repeatedly handling exposed equipment can make the situation worse.
Once the system is working again, drink first, blow the water back into the reservoir, and return the hose to a protected position.
Protect the Reservoir Too
Although the hose usually freezes first, the reservoir can also begin to freeze during prolonged exposure.
To slow the process:
- Keep it in the compartment closest to your back
- Surround it with spare insulating clothing when practical
- Use an insulated reservoir compartment
- Keep it out of external mesh pockets
- Avoid leaving the pack on snow
- Reduce exposure during long rest stops
- Store it in a protected place overnight
Winter camping requires more conservative planning. Once the backpack is removed, the reservoir loses body heat and may remain below freezing for several hours.
Partly frozen closures and connectors can also become difficult to operate. Do not force stiff components, as this may damage the seal or attachment points.
Why You Still Need a Backup Bottle
No combination of insulation and technique can guarantee that a hydration hose will remain usable throughout every winter hike.
The National Park Service’s Yosemite winter travel guidance warns that hydration-pack tubes can freeze and recommends carrying water in another suitable container.
Useful backup options include:
- A wide-mouth water bottle
- An insulated bottle
- A small vacuum flask
- A second container stored inside the pack
- A bottle stored upside down so ice is less likely to block the opening first
Wide-mouth bottles are generally easier to inspect and manage once ice begins forming. Keep them inside the backpack or in an insulated sleeve rather than fully exposed.
For an accessible, short winter route, one backup bottle may be sufficient. Remote routes, strong winds, severe cold, and overnight trips require more cautious water planning.
If you are deciding how much water to carry in each system, compare the practical trade-offs between a hydration pack and water bottle for longer hikes.
What to Look for in a Cold-Weather Hydration Pack
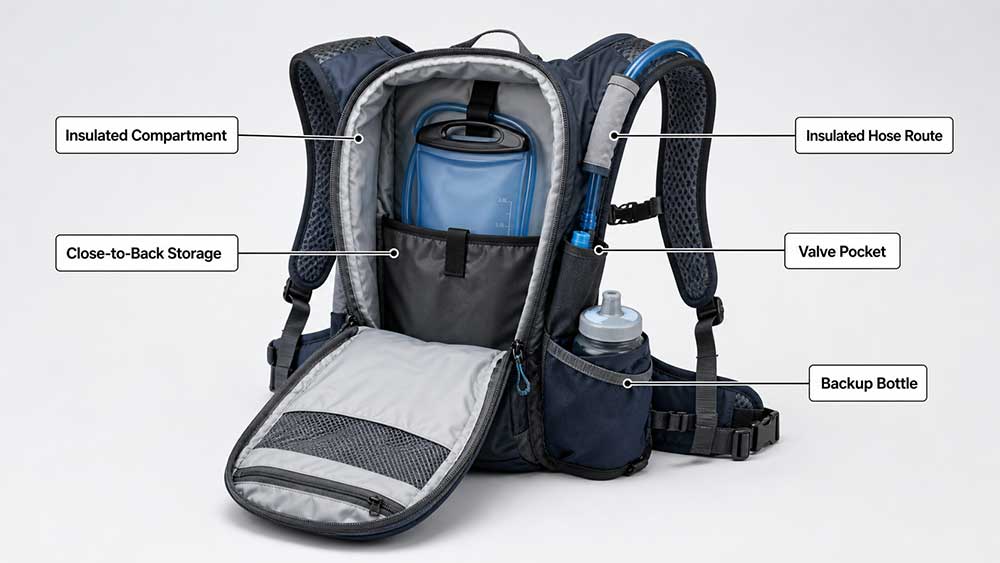
A backpack cannot prevent water from freezing on its own, but several features can reduce exposure and make the system easier to manage.
Look for:
- A protected or insulated hose route
- A covered bite-valve storage point
- A reservoir compartment close to the back panel
- Accessible hose connections
- Space for a backup bottle
- Stable tube clips or attachment loops
These features are helpful, but they do not replace correct use. Even a well-insulated system can freeze if water remains inside the exposed hose.
Winter Hydration Checklist
Before leaving:
- Clean and inspect the reservoir
- Test the hose and bite valve
- Check the permitted water temperature
- Fill with warm rather than boiling water
- Insulate the hose and bite valve
- Place the reservoir close to your back
- Carry a separate backup bottle
While hiking:
- Drink small amounts regularly
- Blow water back after every drink
- Keep the hose out of direct wind
- Protect the bite valve during stops
- Watch for increasing drinking resistance
- Avoid leaving the backpack on snow
- Switch to backup water if the flow cannot be restored
After the hike:
- Empty and rinse the reservoir and hose
- Clean flavored-drink residue promptly
- Dry every component before storage
- Inspect the hose, valve, and fittings for cold-related damage
Final Thoughts
Keeping a hydration hose usable in freezing weather requires a routine rather than one special piece of equipment. Start with warm water, insulate exposed parts, drink regularly, blow the water back after every drink, and keep the bite valve protected.
Most importantly, carry another usable water container. A backup bottle turns a frozen hydration hose from a serious hydration problem into a manageable inconvenience.
Frequently Asked Questions
At what temperature will a hydration hose freeze?
Water freezes at approximately 32°F or 0°C under normal conditions, but there is no single temperature at which every hydration hose will suddenly become blocked. Wind, insulation, starting water temperature, exposure time, and the amount of water left in the tube all affect freezing time.
Is it safe to blow water back into the reservoir?
It is a common winter technique when the hydration system permits reverse airflow. Test the system beforehand and follow its manufacturer’s instructions. Do not force air through a closed valve or damaged connection.
Can you put hot water in a hydration bladder?
Only if the manufacturer permits it and the water remains within the stated temperature limit. Warm water can delay freezing, but boiling water may damage certain reservoir films, seals, hoses, and welded areas.
Why does the bite valve freeze when the insulated hose does not?
The bite valve has narrow internal passages that can retain small droplets after drinking. It may also sit outside the insulated hose cover. Blow the water back and store the valve in a protected cover or pocket.
Is a water bottle better than a hydration reservoir in winter?
A wide-mouth or insulated bottle is usually easier to manage after ice begins forming, but it is less convenient for frequent drinking while walking. Carrying both gives you easy access through the hydration hose and a more dependable backup if the hose freezes.

Comments are closed