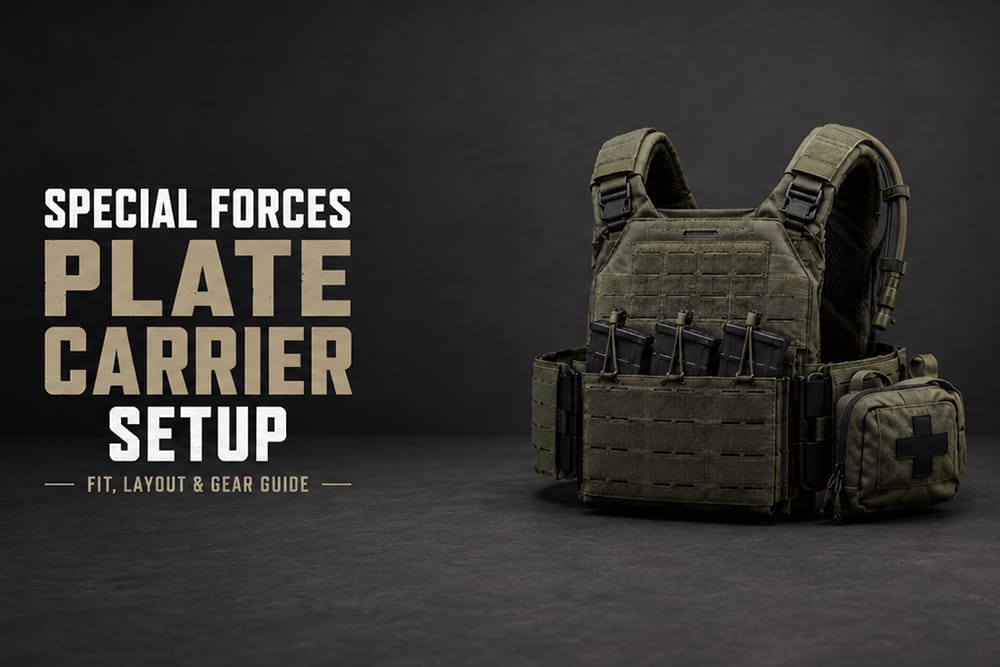
Special Forces Plate Carrier Setup: Fit, Layout & Gear Guide
A special forces plate carrier setup is often misunderstood. The goal is not to attach every possible pouch, tool, and accessory to the vest. A practical setup is built around fit, protection, mobility, weight balance, and fast access to essential gear.
For most users, the best lesson from special operations-style plate carrier setups is discipline. Every item on the carrier should have a clear purpose. If it adds weight, blocks movement, creates bulk, or makes important gear harder to reach, it may not belong on the carrier.
This guide explains how to build a special forces-inspired plate carrier setup from a gear layout perspective. It covers fit, front panel organization, cummerbund setup, shoulder area, rear panel, hydration, medical access, weight distribution, and common mistakes to avoid.
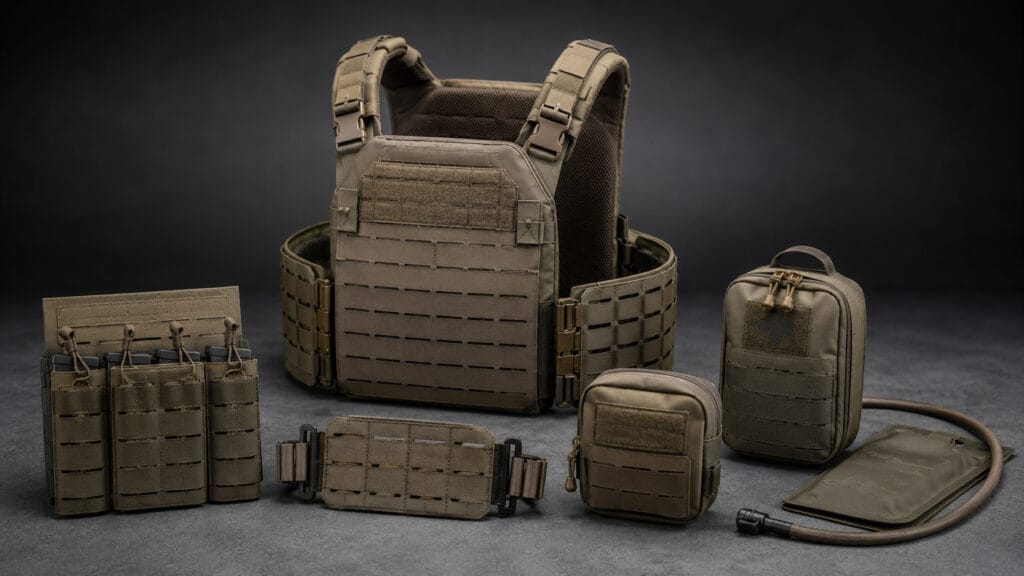
A plate carrier setup is the full configuration of a plate carrier system, including the carrier body, front and rear plate bags, cummerbund, shoulder straps, pouches, placards, hydration, medical storage, communication accessories, and other modular attachments.
The plate carrier itself is the platform. Plates provide the protective structure. Pouches and accessories create the working layout around that platform.
A useful setup should answer three basic questions:
Does the carrier fit correctly?
Can the user move, bend, shoulder, sit, and breathe comfortably?
Are essential items placed where they can be reached without creating unnecessary bulk?
A good plate carrier system should be built around realistic use, not appearance alone. That is why professional-style setups often look simpler than people expect.
Why Special Forces-Inspired Setups Usually Look Minimal
Special forces-inspired plate carrier setups often look clean because the layout is built around efficiency. Extra gear may look impressive, but every added pouch changes weight, movement, heat buildup, and access.
A minimal setup can offer several advantages:
Better mobility when bending, kneeling, climbing, or moving in tight spaces
Less fatigue during long wear
Cleaner shoulder area for packs, slings, or hydration routing
Easier access to high-priority items
Less bulk on the front of the body
Better balance between the front, sides, and rear
The main idea is simple: carry what is necessary, place it where it makes sense, and remove what does not serve the setup.
Start With Fit Before Adding Gear
Fit comes before layout. If the carrier does not sit correctly on the body, even the best pouch arrangement will feel uncomfortable and unstable.
A properly fitted plate carrier should sit high on the torso. The front and rear plate bags should feel secure without bouncing, shifting, or hanging too low. The shoulder straps should hold the carrier in position without digging into the neck, and the cummerbund should keep the carrier stable while still allowing normal breathing.
When adjusting fit, check these areas:
Fit Area
What to Check
Why It Matters
Front plate bag
Sits high and centered on the torso
Helps keep the carrier stable and balanced
Rear plate bag
Matches the front height as closely as possible
Prevents uneven pressure and sagging
Shoulder straps
Secure but not overly tight
Supports weight without restricting movement
Cummerbund
Snug around the body
Keeps the carrier from shifting
Side profile
Not too bulky under the arms
Improves arm movement and comfort
Breathing room
Allows natural breathing under load
Prevents discomfort during long wear
A plate carrier should feel secure, not suffocating. A plate carrier fit properly approach usually means the carrier is high, snug, balanced, and stable during movement.
Understand the Main Zones of a Plate Carrier
A plate carrier is easier to set up when you think of it in zones. Each area has a different purpose, and not every pouch belongs everywhere.
Plate Carrier Zone
Common Use
Key Principle
Front panel
Magazine pouches, placard, admin pouch
Keep access clear and avoid overstacking
Lower front
Dangler pouch, small utility pouch
Useful, but can affect bending or kneeling
Cummerbund
Side pouches, radio, IFAK, side plates
Balance access with mobility
Shoulder area
Cable routing, hydration tube, low-profile pads
Keep clean and low-profile
Rear panel
Hydration, flat storage, team-access items
Avoid heavy items you cannot reach yourself
Interior contact area
Padding, mesh, ventilation
Affects comfort and heat management
Thinking in zones helps prevent one of the most common problems: attaching gear wherever it fits instead of where it works best.
Front Panel Setup
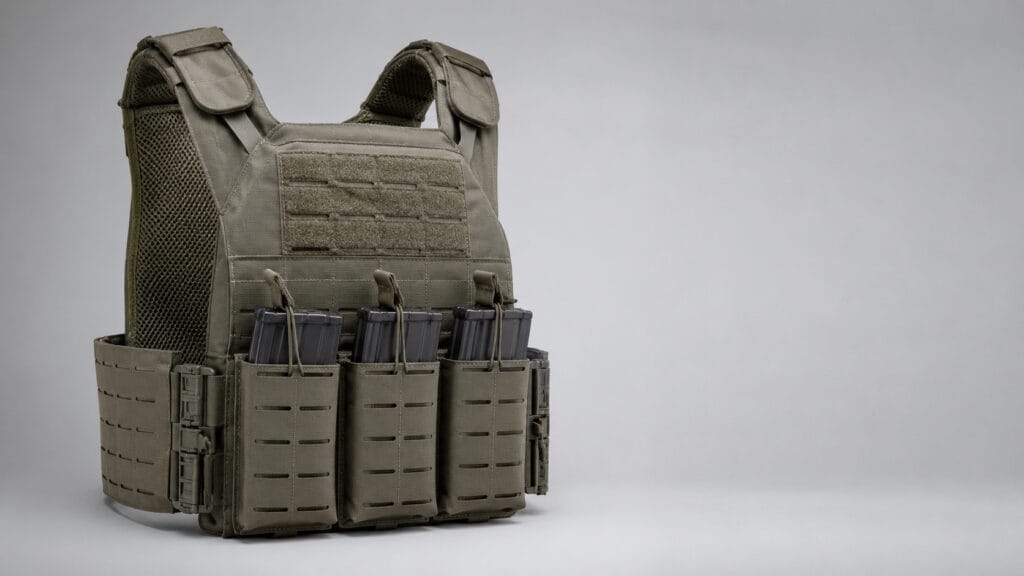
The front panel is usually the most active area of a plate carrier. It is where users often place magazine pouches, placards, admin pouches, or small utility pockets. Because this area is easy to reach, it is tempting to overload it.
That usually creates problems.
A front panel that is too thick can make it harder to bend, sit, go prone, or move through tight spaces. It can also shift the center of gravity forward and increase fatigue over time.
A practical front panel setup should focus on:
Low-profile pouches
Clear access to essential items
Minimal stacking
Secure retention
Enough room for natural arm movement
No unnecessary bulk below the chest
For many setups, a simple placard or flat magazine pouch layout works better than multiple layers of stacked pouches. If an admin pouch is added, it should stay flat and should not block access to higher-priority gear.
Cummerbund Setup
The cummerbund plays a major role in stability and side storage. It keeps the carrier close to the body and gives space for side pouches, radio pouches, IFAK storage, utility pouches, or side plate pockets.
The challenge is balance. Too much gear on the sides can interfere with arm swing, sitting, vehicle movement, or pack straps. A bulky cummerbund may also create pressure under the arms.
Common cummerbund considerations include:
Cummerbund Feature
Why It Matters
Elastic sections
Improve comfort and breathing movement
MOLLE webbing
Allows modular pouch attachment
Laser-cut MOLLE
Reduces bulk and creates a cleaner profile
Side plate pockets
Add structure but also increase weight
Quick-release hardware
Can improve donning and doffing convenience
Stiffened structure
Helps support side-mounted gear
If the setup includes side pouches, keep them slim and purposeful. A radio pouch, compact medical pouch, or small utility pouch may make sense, but large side-mounted pouches can quickly reduce mobility.
IFAK and Medical Access
An IFAK should be easy to identify, easy to reach, and not buried behind other gear. This section is not about medical instruction; it is about placement and access.
A medical pouch should be:
Clearly separated from general storage
Accessible without removing multiple items
Secure enough not to fall off during movement
Positioned where it does not block arm movement
Easy to recognize by touch or visual marking
Some users place medical storage on the cummerbund. Others use a lower front dangler or rear-side position depending on the setup. The most important point is consistency: the pouch should be placed where it can be found quickly and reliably.
Radio and Communication Placement
Radio placement depends on the equipment used, body type, and how much space is available on the cummerbund or front panel. A radio pouch is often placed on the side of the carrier to reduce front bulk while keeping the device close enough for cable routing.
When planning communication placement, consider:
Does the pouch interfere with arm movement?
Can the cable or hydration tube route cleanly?
Does the radio add too much weight to one side?
Can the user access the controls if needed?
Does the placement create pressure under a backpack or outer layer?
Keep the shoulder area as clean as possible. Too many cables, clips, straps, or bulky accessories near the shoulder can interfere with comfort and movement.
Hydration and Rear Panel Setup
The rear panel is often used for hydration, flat storage, or team-access gear. It can be useful, but it should not become a storage area for items that need constant personal access.
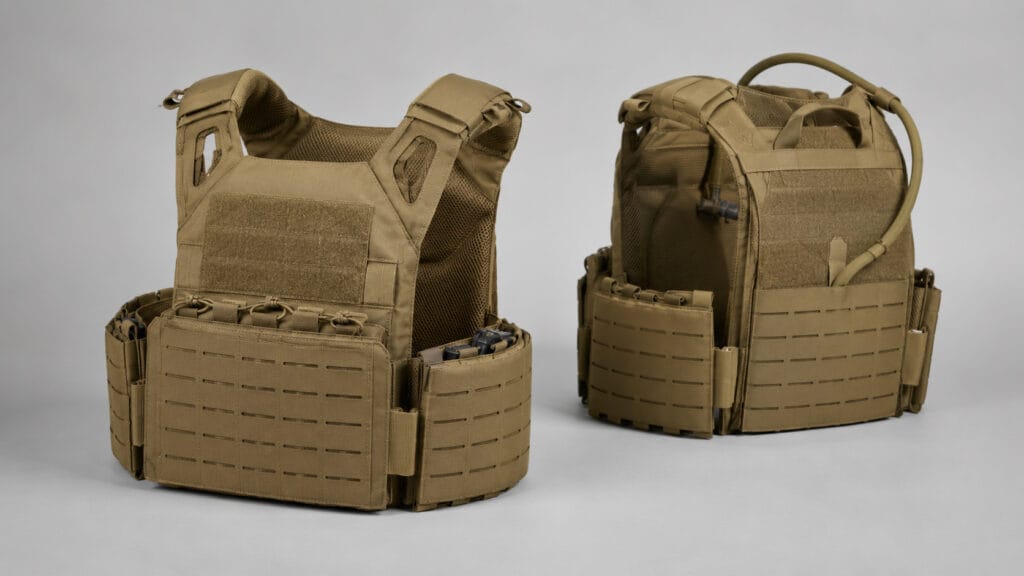
A hydration bladder is one of the most common rear-panel additions. It keeps water close to the body and avoids adding more bulk to the front. However, hydration routing should stay clean and should not clutter the shoulder area.
Rear panel setup should follow a simple rule:
If you cannot reach it yourself, do not place critical personal-access gear there.
The rear panel is better for:
Hydration
Flat storage
Lightweight sustainment items
Team-access pouches
Low-profile zip panels
It is usually not ideal for heavy items that create rear drag or make the carrier pull backward.
Weight Distribution and Mobility
Weight distribution is one of the most important parts of any plate carrier setup. A carrier that looks organized but feels unbalanced will become uncomfortable quickly.
A well-balanced setup should keep weight close to the body, avoid excessive front bulk, and reduce uneven left-right loading. The goal is to make the carrier feel like one stable system instead of a collection of hanging pouches.
Good weight distribution usually means:
Heavier items stay close to the centerline
Front bulk is kept low
Side pouches do not overload one side
Rear storage stays lightweight
Shoulder pressure is even
The carrier does not pull forward or backward
Movement remains natural
Agilite’s plate carrier guide also emphasizes that adding gear should not come at the cost of comfort, access, and movement. Its advice to keep weight distributed evenly fits the same principle: a plate carrier setup should remain functional under real movement, not just look organized when standing still.
Shoulder Area and Cable Routing
The shoulder area is easy to overlook. It may seem like a small part of the setup, but it affects comfort, pack compatibility, sling movement, and hydration routing.
A clean shoulder area helps reduce friction and pressure. It also makes the carrier easier to wear with backpacks, jackets, or outer layers.
When setting up the shoulder area, avoid:
Oversized shoulder pads that rub the neck
Loose cable routing
Hydration tubes crossing awkwardly
Too many clips or accessories
High-profile hardware under backpack straps
Low-profile shoulder padding can be helpful, especially for longer wear, but it should not create unnecessary bulk.
Materials, MOLLE, and Construction Details
A plate carrier setup is not only about where pouches go. Material and construction also affect how the carrier performs.
Common construction details include:
Detail
Why It Matters
500D or 1000D nylon
Affects abrasion resistance, weight, and stiffness
Laser-cut MOLLE
Reduces bulk and creates a cleaner surface
Traditional webbing MOLLE
Offers rugged modular attachment points
Reinforced stitching
Helps support load-bearing areas
Mesh lining
Improves airflow and comfort
Shoulder padding
Reduces pressure during longer wear
Cummerbund stiffness
Helps support side-mounted gear
Drag handle reinforcement
Adds structure to the upper rear panel
For readers comparing materials, Vancharli Outdoor’s guide to 500D vs 1000D nylon for tactical bags offers a useful breakdown of durability, weight, and material trade-offs.
If you are comparing product structures, a tactical plate carrier page can also help you understand common carrier components such as front and rear panels, cummerbund systems, MOLLE webbing, pouch compatibility, and adjustable shoulder construction.
Special Forces-Inspired Setup Example
A clean special forces-inspired setup usually prioritizes essential access, balanced weight, and low bulk. It does not need to copy a specific unit, brand, or operator.
A simple example may look like this:
Zone
Example Setup
Purpose
Front panel
Low-profile placard or flat magazine pouch
Keeps essential access close and organized
Upper front
Small flat admin pouch
Stores notes, small tools, or identification items
Lower front
Slim dangler pouch, optional
Adds small utility space without heavy stacking
Cummerbund left side
Compact medical pouch
Keeps medical gear separated and accessible
Cummerbund right side
Radio or slim utility pouch
Adds function without overloading the front
Shoulder area
Low-profile pads and clean routing
Keeps movement and comfort clear
Rear panel
Hydration or flat storage
Supports longer wear without front bulk
This type of layout is simple, modular, and easier to adjust. It also leaves room for user preference, body type, and actual use case.
Common Plate Carrier Setup Mistakes
Mistake 1: Adding Too Much Gear
More gear does not always mean a better setup. A carrier that is overloaded can reduce mobility, increase fatigue, and make important items harder to reach.
Mistake 2: Copying Someone Else’s Setup
A setup that works for one person may not work for another. Body size, carrier model, training purpose, environment, and gear requirements all matter.
Mistake 3: Ignoring Fit
Pouch layout cannot fix poor fit. If the carrier shifts, sags, or restricts breathing, adjust the base platform before adding more accessories.
Mistake 4: Overstacking the Front Panel
Too much front bulk can make bending, sitting, and moving more difficult. Keep the front clean and avoid unnecessary layers.
Mistake 5: Blocking the Shoulder Area
The shoulder area should stay low-profile. Thick pads, loose cables, and awkward hydration routing can create discomfort.
Mistake 6: Placing Medical Gear Too Deep
Medical storage should not be hidden behind several layers of pouches. Keep it visible, consistent, and easy to identify.
Mistake 7: Loading the Rear Panel Too Heavily
Rear panels are useful, but heavy rear storage can pull the carrier backward and reduce comfort.
Mistake 8: Forgetting Heat and Ventilation
Plate carriers can become hot quickly. Mesh lining, airflow channels, lighter materials, and clean layouts can improve long-wear comfort.
Plate Carrier Setup Checklist
Before finalizing a plate carrier setup, use this checklist:
What to Check
Good Setup Standard
Fit
Carrier sits high, snug, and stable
Front panel
Essential items are accessible without overstacking
Cummerbund
Side gear does not block arm movement
Shoulder area
Clean routing and low-profile padding
Medical pouch
Easy to identify and not buried
Radio pouch
Secure, balanced, and not overly bulky
Hydration
Routed cleanly without shoulder clutter
Rear panel
Lightweight and not overloaded
Weight balance
Front, rear, left, and right feel stable
Movement
User can bend, sit, kneel, and move naturally
Comfort
No sharp pressure points or excessive heat buildup
Modularity
Setup can adapt to different use cases
Final Takeaway
A good special forces-inspired plate carrier setup is not about copying someone else’s kit. It is about building a balanced system around fit, protection, mobility, access, and comfort.
Start with the base carrier. Make sure it fits correctly. Then add only the pouches and accessories that support your real use. Keep the front panel clean, the cummerbund balanced, the shoulder area low-profile, and the rear panel lightweight.
The best setup is not the one with the most gear. It is the one that works when worn, moved in, adjusted, and used over time.
FAQ
What is a special forces plate carrier setup?
A special forces plate carrier setup usually refers to a clean, mobility-focused gear layout inspired by special operations use. It typically emphasizes fit, weight balance, essential access, low bulk, hydration, medical storage, and modular pouch placement.
Should a plate carrier setup be heavy or minimal?
A plate carrier setup should be as light as practical while still supporting the user’s needs. Too much weight can reduce mobility, increase fatigue, and make the carrier harder to wear for long periods.
Where should pouches go on a plate carrier?
Pouches should be placed based on access, weight, and movement. The front panel is usually for essential access, the cummerbund can support side pouches or medical storage, and the rear panel is better for hydration or flat storage.
How should a plate carrier fit?
A plate carrier should sit high and stable on the torso. It should feel snug without restricting breathing, and the front and rear plate bags should sit at similar heights.
Is a rear panel necessary on a plate carrier?
A rear panel is not always necessary. It is useful for hydration, flat storage, or team-access items, but it should not be overloaded with heavy gear that the user cannot reach easily.
What is the best material for a plate carrier?
Many plate carriers use nylon fabrics such as 500D or 1000D nylon. 500D is often lighter and more flexible, while 1000D is heavier and more abrasion-resistant. The best choice depends on durability needs, weight target, and intended use.
Should the shoulder area stay clean?
Yes. A clean shoulder area improves comfort, pack compatibility, hydration routing, and movement. Avoid bulky accessories, loose cables, or thick padding that creates pressure near the neck.
What is the biggest mistake in plate carrier setup?
The most common mistake is adding too much gear before testing fit and movement. A plate carrier should be built around realistic use, not appearance alone.









Comments are closed