Waterproof Bag Failure Analysis: Leaks, Cracks and Delamination
When the same waterproof bag failure appears during sample testing, bulk inspection or customer returns, the main question is not how to patch one bag. It is why the product failed and whether other units may have the same problem.
Start with four steps: confirm the required waterproof performance, mark where the failures appear, compare the failed products with suitable reference samples, and try to reproduce the problem under controlled conditions. This helps separate an isolated defect from a wider material, design or production issue.
If you only need to deal with one personally owned bag, these basic steps for handling a leaking waterproof bag cover leak detection and temporary repair. This guide focuses on repeated failures, affected production lots and corrective decisions.
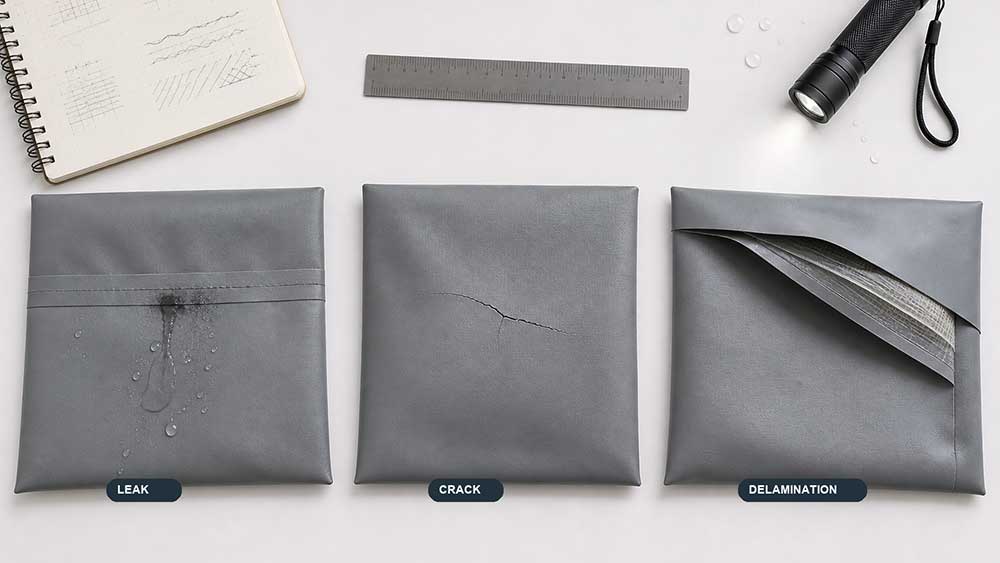
Leaks, cracks and delamination describe different problems. They may occur together, but they do not mean the same thing.
Failure
What it means
First question to answer
Leak
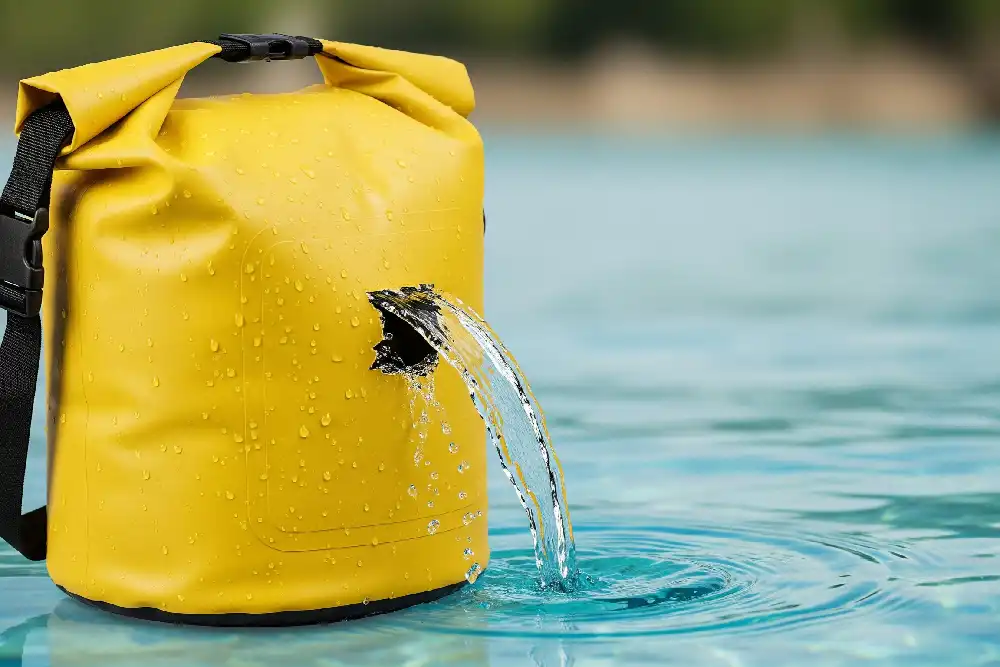
Water has found a path into the bag
Where did the water first enter?
Crack
A coating, film, base fabric or other part has fractured
Which layer or component has cracked?
Delamination
Bonded material layers are separating
Which two layers are coming apart?
A leak is an outcome, not a complete diagnosis. Water may enter through the opening, a seam, an attachment, a puncture or a damaged panel. Likewise, a visible line may be a harmless crease, a surface crack or a structural tear.
A useful defect report describes what changed, where it happened and whether the same problem appears on other units.
Confirm What the Bag Was Designed to Withstand
Before treating a test result as a product defect, confirm the intended level of waterproof performance.
Record:
the expected exposure, such as rain, spray or temporary immersion;
the required closing method;
the load inside the bag;
the test position and duration;
any required preparation before testing, such as temperature or humidity conditioning;
the agreed acceptance criteria.
A bag designed for rain exposure should not automatically be judged against an immersion condition. At the same time, passing a light spray check does not prove that a bag can resist sustained water pressure.
The test and the product claim need to describe the same level of exposure. Otherwise, the team may mistake an unclear product requirement for a production failure.
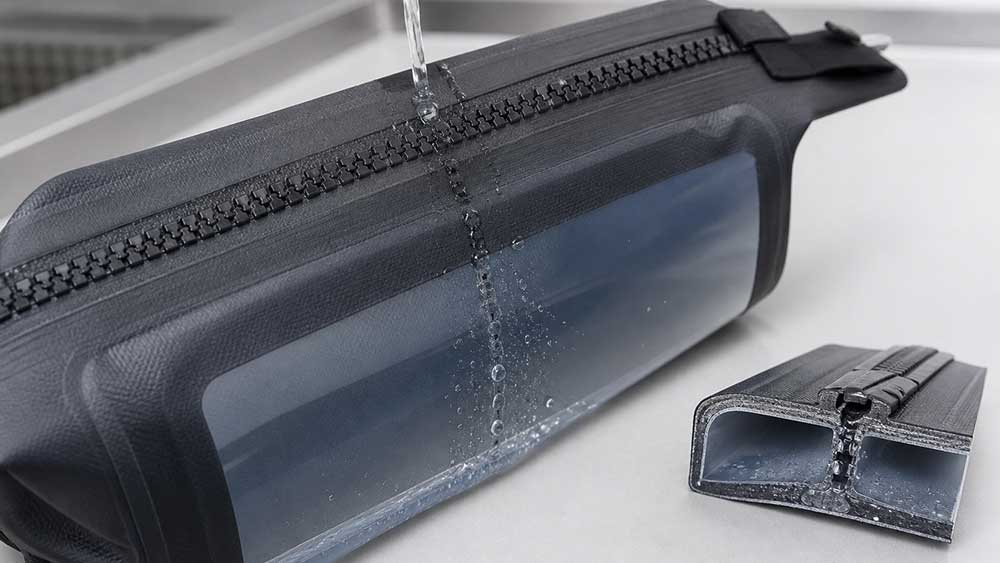
Find the Actual Water Path
Wet contents do not prove that the body fabric has failed. Begin with the first confirmed point of water entry.
Leak location
Areas to examine
Opening or closure
Alignment, distortion, closing method and suitability for the intended exposure
Welded seam
Gaps, contamination, difficult intersections or damage after welding
Taped seam
Tape coverage, lifting, shifting, adhesion and exposed stitch holes
Body panel
Pinhole, puncture, abrasion, coating damage or layer separation
Handle or strap attachment
Needle holes, reinforcement edges, local sealing and concentrated load
Valve, zipper end or fitting
Component connection, transition shape, sealing path and installation damage
Closure-related leakage
A roll-top or zipper closure can leak even when the material and seams remain intact. Misalignment, distortion, trapped material or use beyond the closure’s intended exposure can all create a path for water.
Repeat the agreed test using the specified closing method and loading condition. If the result varies between operators, review the closing procedure and the test method before rejecting the material.
Welded- and taped-seam leakage
RF-welded seams and seam-taped constructions fail in different ways.
A welded joint may contain a small gap or contamination. The material beside the weld may also be damaged by repeated bending or concentrated load. In a taped seam, loose or poorly bonded tape can expose the stitch holes underneath. This comparison of RF-welded and seam-taped dry bags explains the structural differences in more detail.
A leak beside a weld does not prove that the welding settings were wrong. The welded area may still be joined while the material next to it has cracked.
Panel and attachment leakage
When water enters through a body panel, check whether the location matches a packaging fold, a sharp item inside the bag, a hardware edge or an area of repeated rubbing.
If several units leak beside the same handle, valve or reinforcement patch, examine that feature more closely. Its position, shape, stiffness and assembly method may all affect how the surrounding material carries load.
Tell the Different Types of Cracking Apart
“Cracked material” is not precise enough for a useful quality report. The next question is which part of the material has been damaged.
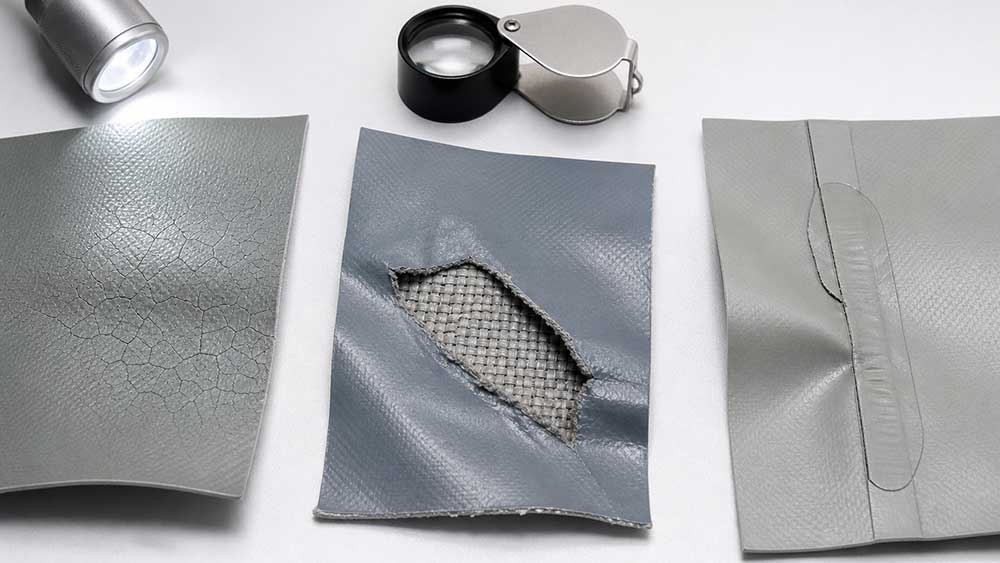
Coating or film cracking
Fine lines can develop in a waterproof coating or film after folding, repeated flexing, aging, cold exposure or contact with an incompatible substance. These are possible causes, not conclusions that can be confirmed from appearance alone.
Some lines remain on the surface. Others extend through the waterproof layer and create a water path. Check whether the line opens when the material is gently flexed and whether water actually enters at the same location.
Base-fabric tearing
When the textile backing has torn, the problem is structural rather than cosmetic. The review may need to consider puncture, cutting, abrasion, excessive load or stress concentrated in one small area.
A patch may cover the opening without restoring the material’s original strength. The extent of the damage and the intended use therefore matter when deciding whether a repaired unit can be accepted.
Cracking beside a weld or reinforcement
A crack at the edge of a weld is different from a weld that has separated.
A relatively stiff welded or reinforced area can move repeated bending into the softer material next to it. When several samples crack along the same edge, review the material’s flexibility, the shape of the corner, the reinforcement layout and the direction of load—not only the machine settings.
Identify Which Layers Are Separating
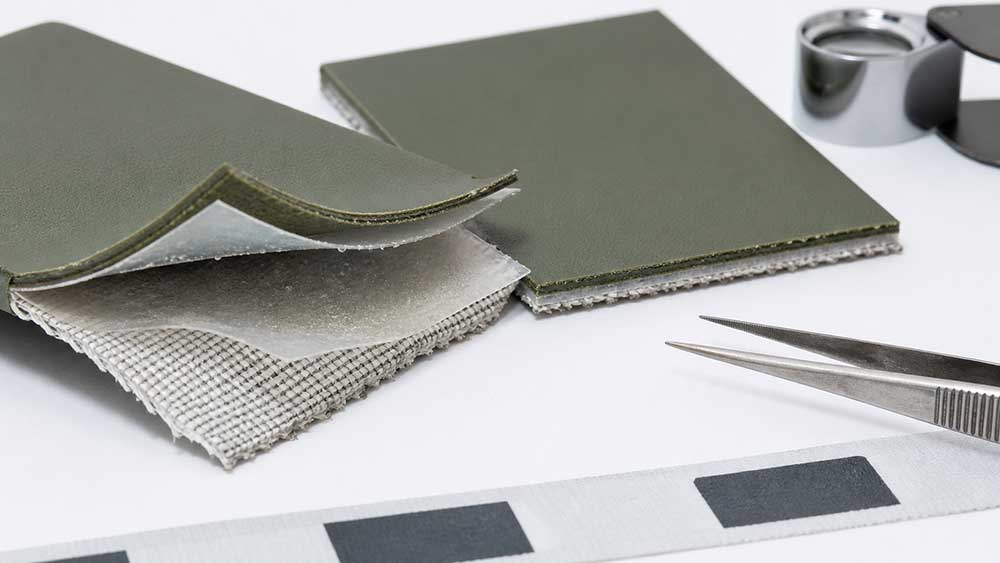
Waterproof bag materials often combine a textile backing with a coating or laminated film. Delamination occurs when layers that should remain bonded begin to separate.
Common signs include:
bubbles or blisters between layers;
film lifting away from the textile backing;
peeling around a cut edge or fold;
loose areas that grow when the material is flexed;
a noticeable change in surface texture around the damaged area.
The defect report needs to state which layers appear to be separating. “TPU delamination,” for example, is not specific enough. It should explain whether the TPU film is separating from the textile, another bonded layer is coming apart, or the problem appears only inside a welded area.
Bonding quality, material compatibility, contamination, temperature, humidity, chemical contact, repeated flexing and aging may all contribute. The team needs to compare the possible explanations with the actual failure pattern before reaching a conclusion.
Material delamination versus weld separation
These problems can look similar near a seam, but they may require very different corrective actions.
Sometimes two panels separate while the coating remains firmly attached to each textile backing. In that case, the weld itself may be the weaker point.
In other cases, the welded surfaces remain joined, but the coating pulls away from the fabric underneath. This points toward the bond within the material rather than the weld.
Increasing weld energy will not correct weak coating-to-fabric adhesion. It may cause further damage instead.
Work Out Why the Product Failed
A reliable review moves from evidence to testing. It should not begin with a preferred explanation.
1. Preserve the failed sample
Do not clean, repair, cut or heavily flex the product before documenting its original condition.
Record:
product model;
production and material lot information;
failure location and size;
when and how the problem appeared;
test or use conditions;
photographs from both sides;
the number and distribution of affected units.
If the sample may later need to be cut open, keep at least one representative product unchanged whenever possible.
2. Mark the affected locations
Mark each confirmed leak, crack or separated area on a product drawing or photograph. Then compare the positions across all affected products.
A repeated location may point toward a seam intersection, packaging fold, component edge or load point. Randomly distributed damage may lead the review in a different direction.
3. Compare suitable samples
Where available, compare:
the failed product;
an unused unit from the same lot;
the approved reference sample;
retained material from the affected lot;
a product from an unaffected lot.
Use the same examination method for every sample. Differences in surface condition, thickness, flexibility or construction can show where to investigate next, but they are not proof by themselves.
4. Reproduce the problem
Use a controlled method that reflects the bag’s intended exposure. Keep the closure, loading, test position, sample preparation and test time consistent.
Avoid uncontrolled internal pressure or any setup that forces the bag beyond its intended use. An unsuitable test can create new damage and make the original problem harder to understand.
A broader waterproof bag quality inspection process can help establish the initial records. Failure analysis then goes further by identifying the exact water path or separated material layers.
5. Check one possible cause at a time
Break the review into simple questions:
Does the material resist water before it is made into a bag?
Does the coating stay attached to the textile backing?
Does the seam remain strong enough for the intended use?
Does the finished bag leak at a closure or attachment?
Does the problem appear only after a relevant temperature, humidity or flexing condition?
This prevents the team from blaming one material or welding setting too early.
6. Confirm the most likely cause
A likely cause becomes convincing when it explains the pattern, produces the same failure during testing and disappears after the corrective change.
If the evidence is incomplete, describe it as a probable cause or an idea that still needs testing. Do not present it as a confirmed fact.
Choose a Test That Matches the Failure
No single test can evaluate every part of a waterproof bag.
ASTM D751 covers several test methods for coated fabrics. These include hydrostatic resistance, which measures how well fabric prevents water from passing through under pressure, as well as coating adhesion, low-temperature crack resistance and seam strength. The selected method and acceptance level still need to match the material and product specification.
ISO 811 also describes a hydrostatic-pressure test for fabric. It does not test the complete bag. A fabric may perform well in this test while the finished product still leaks through its closure, seam or attachment.
Suspected failure
Relevant verification
Water passing through a panel
Agreed hydrostatic-resistance test
Coating separating from the textile
Coating-adhesion or bond-strength test
Material cracking after cold exposure
Suitable low-temperature bend or crack-resistance test
Weld or seam separation
Seam-strength test and local leak examination
Closure leakage
Finished-bag test using the specified closing method
Failure after handling
Reproduction of the relevant loading, folding or rubbing condition
Acceptance criteria need to come from the agreed product specification, buyer requirement or validated test plan. They should not be created after the failure appears.
Decide What to Do With the Affected Lot
The next step depends on both the likely cause and how widely the problem appears.
Failure pattern
Appropriate next step
One clearly isolated workmanship defect
Approve a repair method, rework the unit and retest it
Several failures at the same feature
Pause release and review the design or production process
Failures linked to one material lot
Separate the related material and finished products
Widespread cracking or delamination
Stop local patching and begin a material review
Cause not yet confirmed
Keep affected products on hold while gathering evidence
Exposure exceeded the approved claim
Review the instructions, performance claim and product suitability
A repaired bag should not be accepted simply because the visible opening has been covered. The repaired area still needs to meet the agreed waterproof and structural requirements.
Repeated failure at the same corner, attachment or seam intersection deserves more attention than one random puncture. If the problem continues across different production or material lots, the product specification, design and test method may also need to be reviewed.
Ask the Manufacturer for Useful Evidence
A message saying only that “the bags leak” will rarely produce a reliable answer. Give the manufacturer enough information to trace and reproduce the problem.
Ask for:
the affected production and material lot numbers;
inspection results showing where and how often the problem appears;
production records related to the failed area;
confirmation of any material, component or process change;
a comparison with the approved sample;
an explanation of how the failure may have happened, supported by evidence;
immediate controls, such as separating affected stock and pausing further release;
the proposed corrective action;
test results showing whether the correction worked.
A final cause cannot be confirmed responsibly until the failed samples and relevant production information have been reviewed.
Prevent the Same Failure Before Bulk Release
Failure analysis is most valuable when it leads to a clear change in the product specification or quality-control plan.
Useful actions may include:
defining the expected water exposure and the corresponding finished-bag test;
approving the complete material construction, not only a name such as TPU or PVC;
recording production and material lots so problems can be traced;
controlling changes to films, coatings, reinforcements, closures and welding conditions;
checking corners, folds and attachments for concentrated stress;
keeping approved samples and relevant material references;
adding flexing, cold or aging tests when they reflect expected use;
confirming corrective changes on samples before releasing bulk production.
For RF-welded products, a focused welded-seam inspection before bulk production can help identify visible inconsistencies and establish suitable verification. Seam inspection supports failure prevention, but it does not replace finished-product testing.
Final Takeaway
Leaks, cracks and delamination are signs of failure, not complete diagnoses. Start by confirming what the bag was designed to withstand, preserving the failed sample, marking the damaged areas and comparing the affected products with suitable reference samples.
Controlled testing can then help separate material, design, production, handling and use-related causes. Depending on the evidence, the right decision may be to repair one defect, rework affected units, separate a material lot, change the design or stop shipment.
Can approved waterproof fabric still produce a leaking bag?
Yes. A fabric test does not check every closure, seam, valve, attachment or transition in the assembled product. Both fabric testing and finished-bag testing may be needed.
Does leakage beside an RF weld prove that the welding settings were wrong?
No. The water may be entering through a small gap, contamination, damage after welding or a crack beside the weld. Identify which part failed before changing the production settings.
Can a production lot be released after several leaking units are repaired?
Not automatically. First determine whether the problems are isolated or part of a repeated material, design or production issue. The repaired units also need to pass the agreed test.
Can widespread delamination be corrected with surface patches?
A patch may cover a small damaged area, but it cannot restore the original bond across a widely affected material. Widespread or continuing delamination requires a material-level review.
Should every waterproof bag undergo an immersion test?
No. The test needs to match the intended use and approved performance claim. Bags designed for rain, spray and temporary immersion require different test conditions.






Comments are closed