How to Design a Professional-Looking Business Backpack
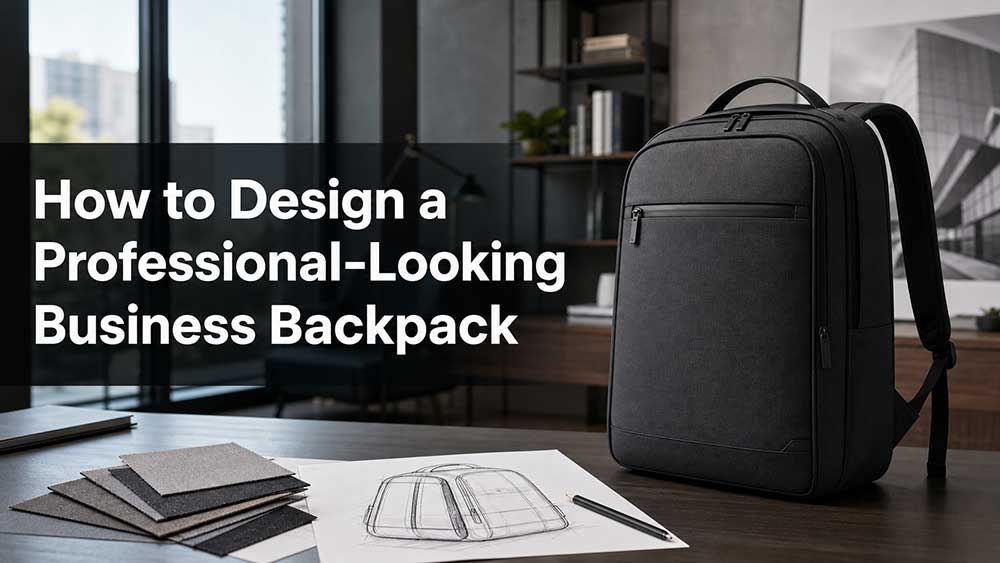
A professional-looking business backpack usually has a controlled silhouette, balanced proportions, restrained branding, refined materials and hardware, and practical organization that does not make the exterior look bulky.
That does not mean every business backpack must be black, made from leather, or stripped of useful features. Professional appearance is less about choosing one premium material and more about making the entire product feel coherent.
The front panel, side profile, zipper lines, shoulder straps, handles, hardware, logo, and pocket openings should look like parts of the same design. The bag should also retain its intended shape after a laptop, charger, documents, cables, and other work essentials are placed inside.
For brands developing a business backpack, the challenge is to create something appropriate for an office without turning it into an uncomfortable box. The product still needs to protect devices, organize daily items, feel comfortable during a commute, work during business travel, and remain commercially realistic for its target market.
This guide explains how to balance those requirements from the first design brief and visual draft through cost review, pattern development, and sample evaluation.
Professional appearance is often described with words such as clean, sleek, minimal, or premium. Those words are useful, but they are too broad to guide an actual product design.
In practical terms, a professional-looking backpack usually has:
A stable silhouette that does not collapse when partially loaded
Controlled depth that does not protrude excessively from the wearer’s back
Balanced height and width
A limited number of visible panel lines
Exterior pockets integrated into the main shape
Zippers and pullers that match the scale of the bag
Restrained use of webbing, mesh, buckles, and elastic cord
Consistent hardware finishes
Materials with an appropriate texture and level of sheen
Branding that supports rather than dominates the design
Shoulder straps and a back panel that look refined as well as comfortable
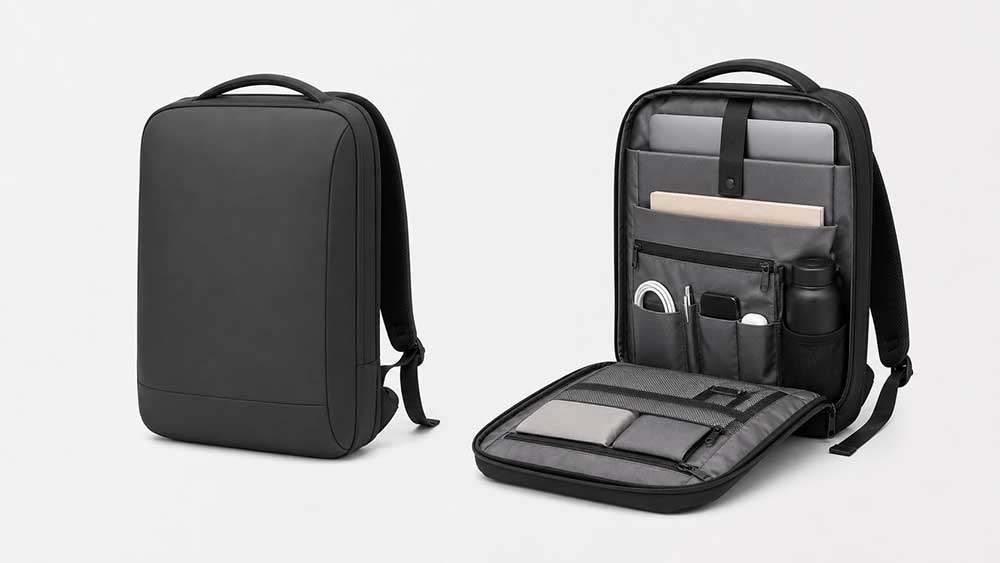
Interior organization that prevents the exterior from bulging
Professional does not have to mean plain. A backpack can have a distinctive top line, an asymmetric pocket, a contrasting lining, a custom puller, or a carefully placed material transition. The difference is that each detail should feel intentional.
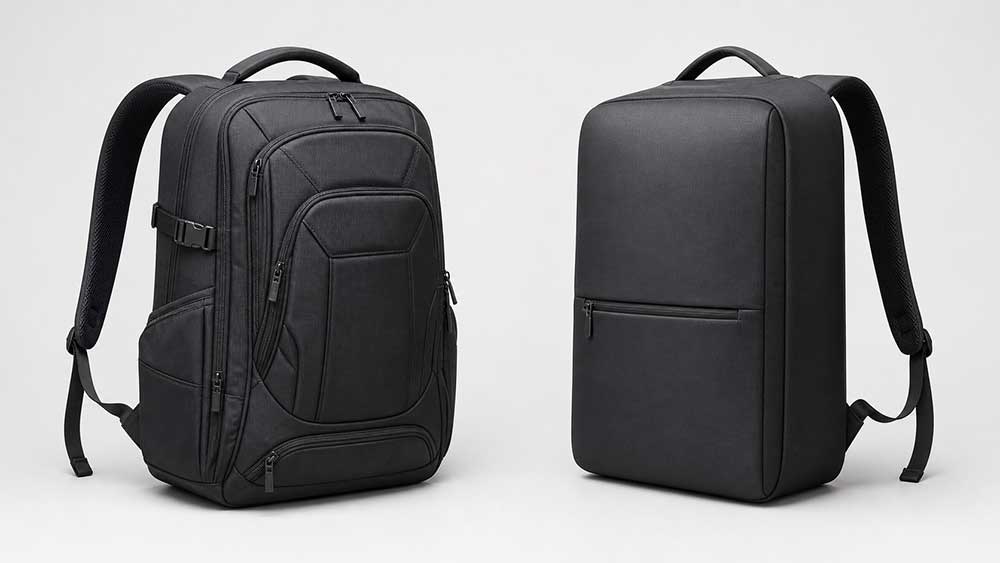
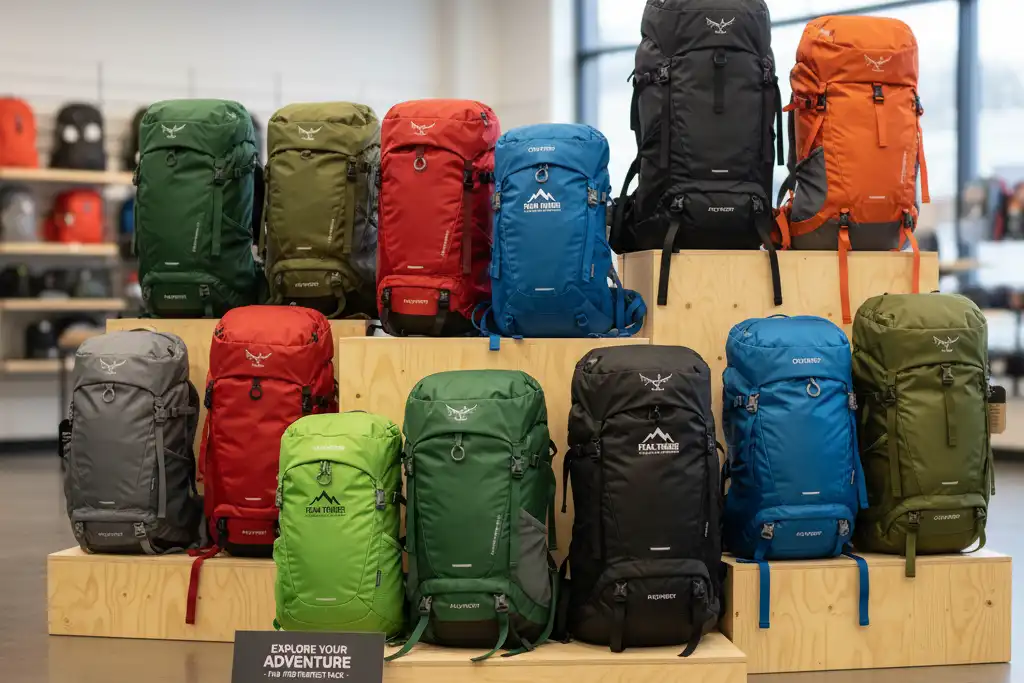
A bag begins to look less professional when too many features compete for attention. Multiple exposed zippers, large logos, reflective panels, compression straps, elastic cords, oversized buckles, contrasting mesh, and several front pockets may all be useful individually, but together they can push the product toward a school, sports, outdoor, or tactical appearance.
Start With the Target User and Work Environment
Do not begin with the number of pockets. Begin with the person carrying the bag.
A backpack designed for a financial consultant meeting clients should not follow the same visual direction as one made for a creative agency employee cycling to work. Both are business backpacks, but their level of formality, daily load, clothing, transport method, and workplace expectations are different.
The design brief should define:
Target profession or user group
Typical workplace
Dress code
Commute method
Laptop and device sizes
Daily carrying load
Need for business travel
Expected retail price
Main sales channel
Brand personality
Geographic market
Consider what the bag will be worn with. A backpack carried over a blazer needs a cleaner, slimmer strap system than one intended for casual outerwear. A commuter using trains may value fast-access pockets, while someone driving to an office may care more about a structured shape and a comfortable top handle.
The intended environment should influence every major decision, including capacity, materials, external organization, colors, hardware, and logo treatment.
Match the Design Direction to the Business Use Case
There is no single correct business backpack design. The right direction depends on the market position and intended use.
Target Use
Capacity Direction
Exterior Direction
Material Direction
Branding Direction
Executive office
Approximately 16–20L
Slim, structured, minimal seams and hidden access
Refined nylon, leather, PU and textile combinations
Small metal plate, debossed patch, or tonal mark
Daily office commute
Approximately 18–24L
Clean front panel with practical quick access
Nylon, polyester, recycled fabric, or coated textile
Tonal embroidery, subtle heat transfer, or woven label
Business travel
Approximately 22–28L
Controlled depth, luggage compatibility, separate tech access
Abrasion-resistant nylon or structured polyester
Small exterior logo and branded interior details
Corporate or promotional program
Approximately 18–24L
Simple, broadly acceptable shape with a clear branding area
Stable stock polyester or nylon
Embroidery, heat transfer, rubber patch, or woven label
Premium retail collection
Approximately 18–24L
Distinctive but restrained silhouette
Premium nylon, refined PU, leather trims, or custom lining
Custom hardware, small patch, or subtle metal branding
Hybrid work and gym
Approximately 22–28L
Business exterior with secondary functions concealed
Structured textile with washable interior zones
Low-key exterior branding
These ranges are design directions rather than fixed standards. A 17-inch workstation laptop, camera equipment, overnight clothing, or a separate shoe compartment may require more space.
The more important question is whether the added capacity can be integrated without making the backpack appear oversized for its intended business environment.
Let Market Position and Target Sourcing Cost Guide the Design
This is where an attractive concept often meets its first commercial constraint.
A design may look right on screen, but the brand still needs to determine whether its materials, labor, construction, and customization can be supported by the intended retail position.
The target retail price and target sourcing cost are related, but they are not the same.
The retail price reflects how the product will be positioned in the market. The target sourcing cost is the manufacturing or purchase-cost range the brand can support, such as an ex-factory or FOB target depending on the quotation basis.
A backpack developed for premium direct-to-consumer retail may support different materials and construction from one intended for wholesale, corporate gifting, promotional distribution, or a price-sensitive retail chain.
How Cost Affects Structure
Construction directly affects material consumption, labor, sampling difficulty, and production time.
Cost may increase when a design includes:
Multiple separate compartments
Complex curved panels
Hidden zipper construction
Piping or bound edges
A separate laptop compartment
Suspended laptop protection
Thick back-panel and shoulder-strap padding
Molded or custom components
Reinforced handles
Expandable sections
Concealed bottle pockets
A trolley sleeve
Numerous internal organizers
Complicated material combinations
This does not mean those features should automatically be removed. The design team should identify which ones are essential to the user and which ones increase cost without adding enough practical or visual value.
A separate rear laptop compartment may be important for a business-travel backpack, for example, but unnecessary for a simple corporate office bag. A concealed bottle pocket may support a premium exterior, while a basic internal holder may be more suitable for a cost-controlled program.
Match Materials to the Price Position
Material decisions should begin with the target market rather than the most expensive available option.
A premium collection may justify higher-grade textiles, custom-dyed materials, refined PU or leather trims, branded lining, custom pullers, higher-density foam, or specialized hardware.
A mid-market or corporate program may still look professional through:
Stable stock fabrics
A clean matte surface
Tonal webbing and zipper tape
Reliable standard hardware
Simplified panel construction
Controlled logo placement
A limited color range
A lower-cost option should not automatically look cheap. Good proportions, controlled seams, consistent colors, and an appropriate surface texture can create a professional result without expensive leather or custom metal components.
Separate Essentials From Optional Upgrades
Before sampling, divide the design requirements into three groups:
Priority
Meaning
Examples
Essential
Required for the product to perform its primary purpose
Useful but adjustable if the cost target cannot support it
Extra organizer pockets, custom metal plate, hidden bottle pocket, additional travel features
This makes cost optimization more controlled.
Instead of reducing quality evenly across the entire product, the team can protect the features customers will see and use most while simplifying details that provide less value.
The design should be reviewed against the target sourcing cost before pattern development and sampling become difficult to change. Cost engineering works best when it is part of the design process, not a reaction to a finished sample that is already too expensive.
Build a Clean, Controlled Silhouette
Silhouette is the first thing people notice, even before they identify the fabric or logo.
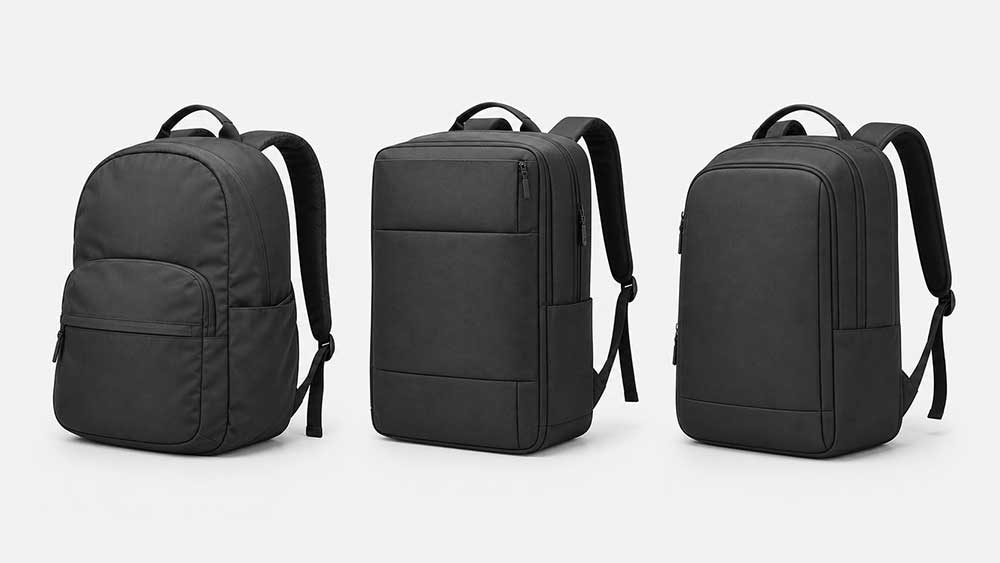
For most business backpacks, a moderately rectangular body with softened corners works well. It provides enough structure for laptops and documents while avoiding the rigid appearance of a hard equipment case.
A completely rounded top may make a bag look casual or school-oriented. A very square top can feel technical or box-like. The right solution is often a controlled top radius that supports easy zipper movement without making the backpack look overly sporty.
The side profile matters just as much as the front.
A professional backpack should not become dramatically thicker at the bottom or swell in the center after loading. The side gusset, internal organization, foam, and reinforcement should work together to control the shape.
During early design, review the silhouette in at least four conditions:
Empty
Lightly loaded
Half loaded
Filled with the intended daily items
A bag that looks elegant only when empty is not fully resolved. The loaded shape is the shape customers will see most often.
Get the Size, Capacity, and Proportions Right
Capacity influences professional appearance, but the liter number alone does not determine whether a bag looks bulky.
Two 22-liter backpacks can look completely different depending on their height, width, depth, opening structure, pocket construction, and internal layout.
Height
A taller bag can look streamlined, but it should remain proportionate to the target user. If the body extends too far below the waist or above the shoulders, it may look awkward and affect carrying comfort.
Width
Extra width can help fit documents and larger laptops, but an excessively wide backpack can look like luggage when worn. It may also interfere with arm movement.
Depth
Depth has the strongest effect on visual bulk. Adding another front compartment may appear useful on paper, but it can create a thick, layered profile once the pockets are filled.
Top and Bottom Proportions
A slightly wider base can improve stability, but too much taper may make the backpack look like an outdoor daypack. A completely uniform box can feel rigid.
Small proportion changes often produce a more natural, professional shape.
The design team should define capacity around the intended load:
Laptop
Tablet
Documents
Charger
Mouse
Cables
Notebook
Headphones
Water bottle
Personal items
Travel items, where relevant
Do not add capacity without identifying what the extra space is meant to carry. Unassigned volume often becomes unnecessary depth.
Use Panel Lines and Seams With Restraint
A clean backpack does not necessarily have fewer pattern pieces. It has fewer visual interruptions.
Some seams are necessary for shape, reinforcement, padding, pocket access, or material transitions. Others are decorative. Every visible seam should have a reason to exist.
Panel lines can be used to:
Control the three-dimensional shape
Integrate a hidden pocket opening
Separate two materials
Reinforce a high-stress area
Create a recognizable brand detail
Support foam or internal organization
Avoid adding curved seams, diagonal sections, and decorative topstitching simply because the front panel feels empty.
Empty space is not automatically a design problem. In business products, controlled negative space often makes the materials, logo, and proportions feel more deliberate.
Where possible, align pocket openings with existing panel lines. A front pocket zipper can sit inside a seam or under a narrow welt instead of becoming another independent line across the face of the bag.
The sewing thread also affects appearance. Tonal stitching usually creates a quieter result, while contrast stitching draws attention to every construction line. Contrast can work for a design-led collection, but it should be intentional and consistently applied.
Design External Pockets Without Creating Bulk
Business users still need fast access to keys, cards, phones, earbuds, travel documents, and small accessories. The solution is not to remove exterior storage, but to integrate it more carefully.
Useful approaches include:
A vertical zipper concealed beside a front panel
A top pocket integrated below the carry handle
A shallow front pocket that does not overlap the fullest part of the main compartment
A back security pocket positioned behind the lumbar area
A side-access pocket with a color-matched zipper
A hidden or expandable bottle pocket
An internal organizer placed close to the wearer rather than against the front panel
Pocket placement should account for how the bag changes when filled. If a front organizer shares space with a full main compartment, chargers and cables may push outward and distort the exterior.
A bottle pocket creates another common design conflict. Open elastic mesh is practical, but it may look too casual for an executive product.
Alternatives include:
A zippered expandable pocket
A folded fabric pocket that sits flat when empty
A side pocket made from the same exterior material
An internal bottle holder
A pocket concealed inside the side seam
The best choice depends on how often the target user carries a bottle and how formal the product needs to appear.
Choose Materials That Look Refined in Real Use
Material selection affects more than durability. It determines how light moves across the surface, how sharply the bag holds its shape, how seams sit, and how the product ages.
Professional appearance usually benefits from materials with:
Consistent surface texture
Controlled sheen
Sufficient body and recovery
Clean color
Good resistance to creasing
Appropriate abrasion resistance
Stable lamination or backing
A hand feel that matches the price point
A material does not need to be expensive to look professional. A well-selected polyester with a dense weave, matte finish, clean backing, and suitable reinforcement may look more refined than a poorly selected nylon or synthetic leather.
Nylon
Nylon can create a premium technical appearance and often offers good durability. However, yarn type, weave, finish, and sheen matter.
A very shiny ballistic weave may look rugged or travel-oriented, while a finer matte nylon may suit a modern office collection.
CORDURA® states that its ballistic fabric uses high-tenacity nylon 6,6 filament yarns and a dense basket weave to support tear and abrasion resistance, while bright filament yarn also gives the fabric its characteristic luster and sheen.
That combination can suit durable travel or technical business bags, but it may look too rugged or glossy for some formal office collections.
Polyester
Polyester offers broad color options and can support competitive price points. It can look professional when the weave is fine, the surface is controlled, and the structure is properly reinforced.
PU and Vegan Leather
PU can add a smooth, formal surface, but quality varies widely. Excessive shine, weak recovery, thin backing, or an overly soft hand can make the product look less premium.
PU should also be evaluated around folds, handles, zipper ends, and high-contact areas.
Genuine Leather
Leather can create a timeless executive appearance, but it adds weight, cost, care requirements, and construction complexity. It is not a requirement for professional design.
Mixed Materials
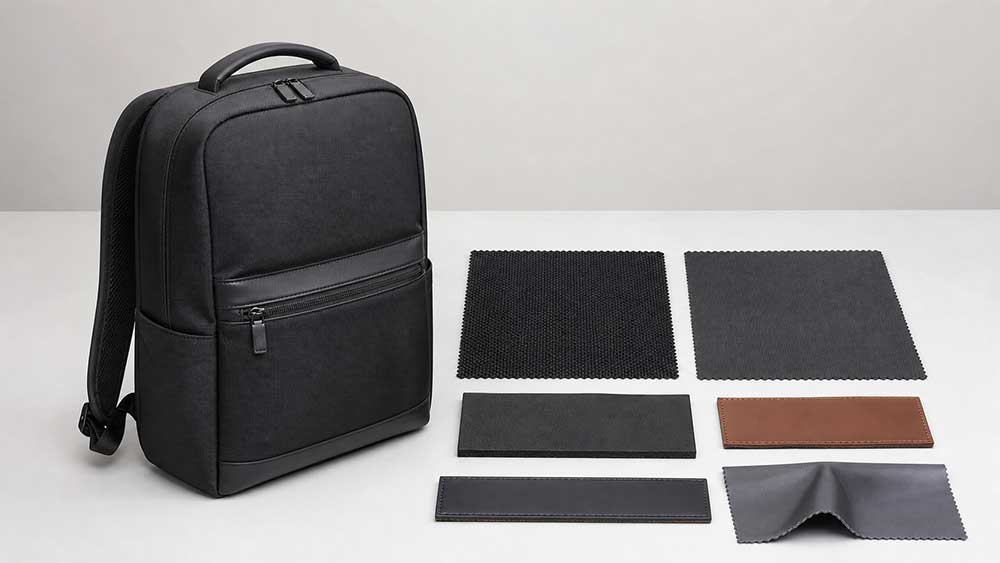
A textile body with leather or PU handles, zipper tabs, corner panels, or logo patches can create visual depth without making the entire backpack heavy.
The trim should reinforce the design rather than look like an unrelated decoration.
For a broader comparison, this guide to materials for business bags and laptop bags explains how appearance, durability, weight, water resistance, and cost differ across common options.
Use Color to Support the Brand Position
Black is common in business backpacks because it is easy to coordinate, hides wear, and works across formal and casual environments. But professional design is not limited to black.
Other useful directions include:
Charcoal
Navy
Dark brown
Deep olive
Stone gray
Taupe
Muted burgundy
Dark green
The color should support the material and product position. The same navy can look corporate in a smooth polyester, technical in a coated nylon, or luxurious in leather.
Color also needs to be controlled across:
Main fabric
Lining
Webbing
Binding
Zipper tape
Thread
Plastic hardware
Metal hardware
Logo
Packaging
Small mismatches are especially visible in a minimal product because there are fewer decorative elements to distract the eye.
For production communication, brands can use Pantone’s textile color systems alongside physical swatches. A digital color displayed on a monitor should not be treated as the only approval standard for fabric, webbing, lining, or trims.
The lining does not have to match the exterior. A lighter or contrasting interior can improve visibility and create a controlled brand moment while the exterior remains understated.
Select Hardware That Fits the Product Level
Hardware can make a simple backpack feel refined or make a good design feel inconsistent.
Review:
Zipper chain
Slider finish
Puller shape
Buckles
Strap adjusters
D-rings
Handle attachments
Decorative rivets
Logo plates
Bottom feet
For professional designs, matte black, gunmetal, brushed metal, dark nickel, or carefully selected color-matched hardware often works better than highly reflective finishes.
Consistency is more important than using metal everywhere.
A backpack with a polished silver logo plate, matte black sliders, bright nickel D-rings, and gray plastic adjusters may feel unresolved even if each component is individually acceptable.
Pullers should be proportionate to the bag. Oversized pullers can look sporty or travel-oriented. Very small pullers may look refined but become difficult to use.
Plastic hardware can still be appropriate, especially on shoulder-strap adjustments where weight and comfort matter. The shape, finish, color, and quality of the component determine whether it feels professional.
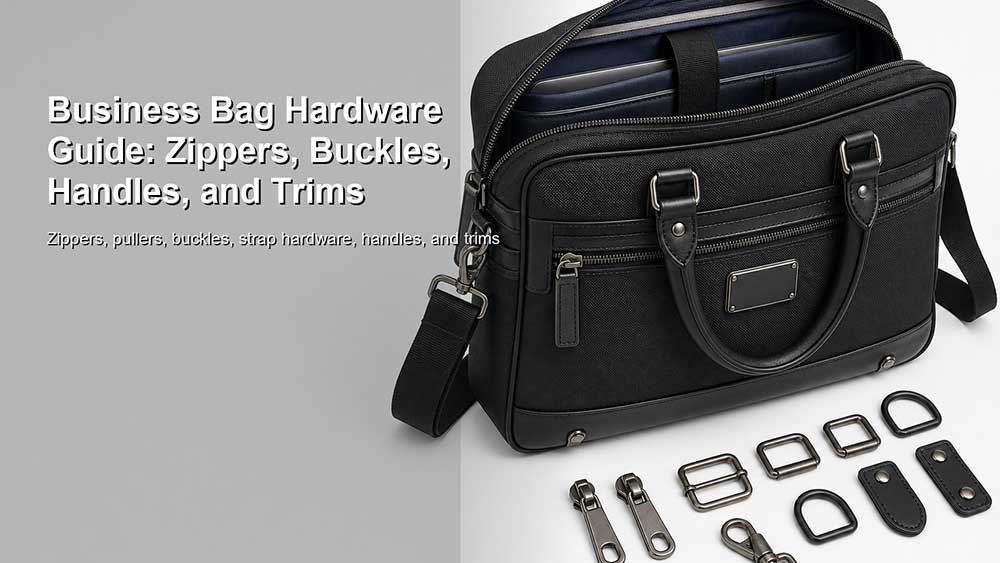
A detailed business bag hardware guide can help brands compare zipper, handle, buckle, and trim choices without treating every metal component as an automatic upgrade.
Keep Logos and Branding Subtle
A professional backpack should still be recognizable as part of a brand, but the logo should not replace product design.
Suitable branding options may include:
Tonal embroidery
Small woven label
Debossed leather or PU patch
Subtle heat-transfer mark
Rubber patch with low contrast
Small metal plate
Custom zipper puller
Branded lining
Repeated interior label details
The right method depends on the target price, material, order quantity, and brand identity.
Ask three questions:
Is the logo visible enough at a normal viewing distance?
Does it compete with a zipper, panel line, or hardware?
Will the same logo treatment still look appropriate after regular use?
Large, high-contrast branding may work for promotional or streetwear products, but it can reduce versatility in more formal office environments.
Brand identity can also come from silhouette, pocket geometry, zipper pullers, lining color, handle construction, and repeated material details. A recognizable product does not always need a large exterior mark.
Hide Function Inside a Clean Exterior
Minimal design should not mean poor organization.
The goal is to place complexity where the user needs it without displaying every feature on the outside.
A business backpack may need:
Laptop compartment
Tablet sleeve
Document section
Charger pocket
Cable organization
Mouse pocket
Phone pocket
Pen slots
Key leash
Sunglasses pocket
Security pocket
Bottle pocket
Trolley sleeve
Clamshell or wide-opening access
Travel document access
Not every product needs every feature.
Each added pocket introduces material, stitching, weight, cost, and possible bulk. More organization can also reduce flexibility if every item is expected to fit one tightly defined space.
A useful approach is to establish an organization hierarchy:
Dedicated protection for expensive devices
Secure storage for valuable small items
Quick access for frequently used items
Flexible space for personal items
Optional travel features based on the target market
The front of the backpack should not become the storage area for every dense item. Chargers, power banks, adapters, and cables can make a clean panel bulge.
Positioning heavier organization closer to the back panel often improves both appearance and weight balance.
Design the Laptop Compartment Around Real Devices
A business backpack may look professional, but it will fail as a product if the laptop compartment is poorly sized or protected.
Do not design the compartment around the screen-size label alone. Two laptops marketed as 15.6-inch devices can have different body dimensions.
Define:
Maximum device width
Maximum device depth
Maximum device thickness
Required clearance
Whether a protective shell may be used
Laptop-compartment opening width
Retention method
Padding location
Bottom protection
Tablet compatibility
Protection options may include:
Front and back foam
Side padding
Raised or suspended bottom
Soft lining
Corner protection
Retaining strap
Separation from chargers and hard accessories
The compartment should provide enough protection without adding unnecessary bulk to the whole backpack.
For more detailed protection criteria, the guide to what makes a good laptop bag covers fit, padding, bottom clearance, organization, materials, and carrying comfort.
Balance Professional Appearance With Carrying Comfort
A thin shoulder strap may look elegant on a table but become uncomfortable during a commute. An aggressively contoured strap with thick mesh and exposed webbing may feel supportive but look too athletic.
The shoulder-strap design needs to balance both.
Consider:
Strap width
Foam thickness
Edge construction
Curvature
Anchor position
Adjustment range
Webbing width
Loose strap management
Back-panel contact
Clothing friction
A shoulder strap designed for a business backpack can still use ergonomic curves and padding, but its outer profile should remain controlled.
Mesh can be placed on the body-facing side rather than wrapping visibly around the edges.
Loose webbing tails are another small detail that can make a backpack look unfinished. Elastic keepers, folded ends, or concealed adjustment systems can keep the profile tidy.
The back panel should support ventilation and comfort without becoming visually dominant. Large contrasting mesh zones and heavily molded channels may push the bag toward an outdoor aesthetic. Tonal materials and simpler channel geometry can provide comfort more discreetly.
Top handles also matter.
A business backpack is often lifted beside a meeting table, from a car seat, or from an airport security tray. The handle should feel intentional, comfortable, and stable rather than like a thin webbing loop added at the end of development.
Avoid Features That Make the Backpack Look Too Sporty
Outdoor, sports, tactical, and travel features are not inherently bad. The issue is whether they fit the target business environment.
Features that often make a backpack appear more casual include:
Exposed compression straps
Bungee cord
Daisy chains
MOLLE-style webbing
Oversized plastic buckles
Large reflective sections
Bright zipper pulls
Contrasting athletic mesh
Open elastic bottle pockets
Multiple external attachment points
Bulky molded panels
Excessive color blocking
Large ventilated shoe compartments
When one of these functions is necessary, it can often be simplified or concealed.
For example:
Place compression inside the bag.
Use a tonal reflective print rather than a large silver strip.
Conceal the bottle pocket behind a zipper.
Integrate a shoe compartment into the base or side seam.
Use internal attachment loops instead of exterior webbing.
Match mesh and webbing colors to the shell.
The goal is not to remove utility. It is to make the utility appropriate for the product’s setting.
Refine the Visual Direction Before Pattern-Making
A rough sketch can communicate the idea, but it cannot always reveal whether the side depth, zipper path, shoulder straps, and front-panel proportions belong to the same product.
Before pattern-making begins, the design team should refine the product’s visual language and resolve its main proportions.
The process may begin with hand sketches, a mood board, reference images, or quick digital concepts. These early drawings are useful for exploring ideas, but they are rarely accurate enough to judge whether the backpack will look balanced from every angle.
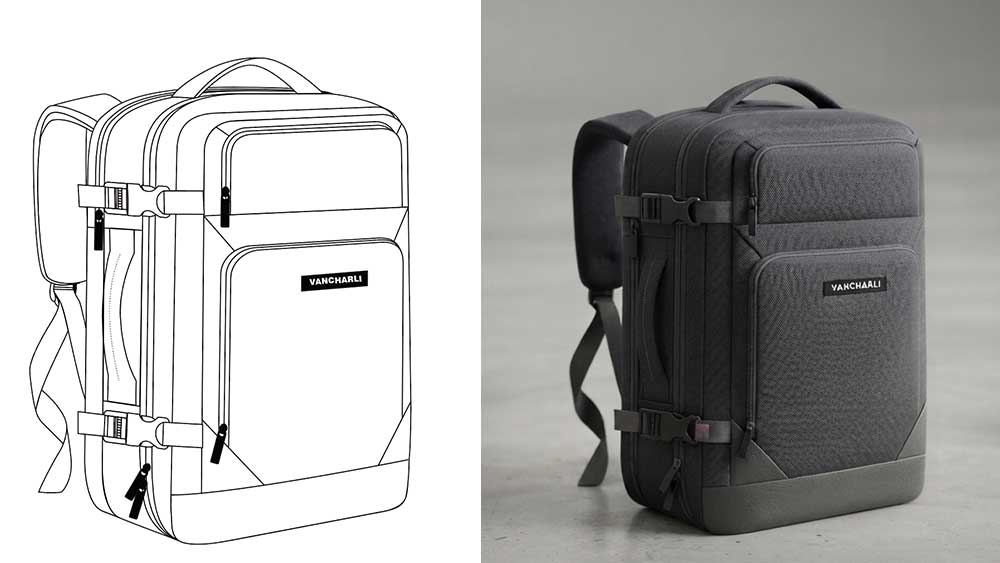
An Adobe Illustrator design draft can turn the selected concept into a clearer two-dimensional design study.
At this stage, the purpose of the editable drawing is not to prepare logo, label, or packaging files for production. It is to examine and improve the backpack itself.
The design draft should normally show:
Front view
Side view
Back view
Top or opening view where necessary
Main-compartment depth
Laptop-compartment position
Panel lines
Pocket openings
Zipper paths
Handle proportions
Shoulder-strap position
Material transitions
Hardware placement
Logo scale and location
Compare Proportions Before Choosing One Direction
Small proportion changes can make the same backpack look executive, modern, casual, sporty, or travel-oriented.
The design team can compare:
A taller and slimmer body
A shorter and wider body
Different side-panel depths
A square top versus a softened top radius
A flat front versus a layered front pocket
A visible zipper versus a concealed opening
A narrow handle versus a more substantial handle
These comparisons are easier and less expensive to make in a design file than after the first physical sample has been completed.
Review the Side and Back as Carefully as the Front
A common mistake is spending most of the design time on the front view.
The front may look minimal while the side profile is too thick, the shoulder straps appear too athletic, or the back panel introduces visual details that do not match the rest of the bag.
The side-view drawing should show how far the bag projects from the wearer’s back and whether external pockets add unnecessary depth.
The back-view drawing should review:
Shoulder-strap width
Strap spacing
Webbing exposure
Back-panel geometry
Trolley-sleeve placement
Security-pocket position
Top-handle integration
A professional design needs to feel consistent from every viewing angle.
Simplify Panel and Zipper Lines
Adobe Illustrator is particularly useful for testing whether every visible line is necessary.
The team can temporarily remove or reposition:
Decorative seams
Extra front-panel divisions
Multiple zipper lines
Exposed pocket openings
Material transitions
Contrast stitching
Oversized logo areas
If the product looks more controlled after one of these elements is removed, the original detail may not be contributing enough to justify its visual and production cost.
Test Color, Material, and Hardware Combinations
The design draft can also compare several color and material directions before physical swatches are selected.
For example:
A monochrome black exterior
A navy body with black trims
A charcoal shell with gunmetal hardware
A textile body with tonal PU details
A dark exterior with a lighter interior
A small metal logo versus tonal embroidery
Digital color studies cannot replace physical material approval, but they help the design team identify which combinations support the intended brand position.
The selected direction should also be reviewed against the target sourcing cost. A combination may look appropriate in the draft but still require adjustment if it relies on too many custom-dyed materials, custom molds, or premium trims.
Check the Logo in Relation to the Whole Product
The logo should be reviewed as part of the overall composition rather than added after the backpack design is complete.
The draft can help determine:
Whether the logo is too large
Whether it competes with a zipper or panel seam
Whether the placement feels balanced
Whether the mark should be centered or offset
Whether exterior branding is needed
Whether the branding would work better on a puller, patch, handle, or lining
A professional backpack often benefits from a smaller logo supported by stronger product proportions and more consistent details.
Confirm the Direction Before Pattern-Making Begins
The approved visual draft should give the pattern-making team a clear direction, but it should not be mistaken for a finished technical pattern.
A two-dimensional drawing cannot fully predict how foam, fabric thickness, seam allowance, zipper construction, lining, and reinforcement will behave in three dimensions.
Its purpose is to settle the major visual and preliminary cost decisions before the factory invests time in pattern development and prototype construction.
Once the silhouette, proportions, panel layout, pockets, materials, branding direction, and preliminary cost structure are approved, the pattern maker can begin translating the design into a workable physical structure.
Turn the Design Concept Into a Workable Pattern
A clean rendering does not guarantee a clean physical backpack.
The design must be translated into flat patterns, seam allowances, foam pieces, reinforcement panels, zipper paths, lining components, and an assembly sequence.
During pattern development, the team needs to resolve:
How the front and side panels create volume
Whether the top radius allows smooth zipper movement
Where foam ends and seams begin
How material thickness affects folded edges
Whether the laptop compartment changes the back-panel shape
How pocket bags share internal space
How the handle load transfers into the body
Whether the bag stands or collapses
How piping or binding affects the silhouette
Whether different materials can be sewn cleanly together
Whether the design can be repeated consistently in bulk production
Whether the structure still aligns with the target sourcing cost
Materials behave differently. A pattern developed for a soft polyester cannot always be transferred directly to thick ballistic nylon, laminated fabric, PU, or leather without adjustment.
The first prototype is where the drawing meets fabric behavior, gravity, construction limits, and a real daily load.
Some issues only become visible in three dimensions:
A panel looks too wide.
The top becomes too round.
The front pocket distorts the face.
The zipper pulls against a curve.
The straps sit too far apart.
The handle causes the top to collapse.
The side pocket changes the profile.
The laptop compartment makes the back panel too rigid.
The construction requires more material or labor than the target allows.
These are normal development findings. The value of the prototype is that it exposes them before bulk production.
Evaluate the First Sample in Real Business Scenarios
Do not approve a business backpack only from studio photos or while it is empty on a white table.
Review it in the situations where the customer will actually use it.
Test Different Loads
Evaluate the bag:
Empty
With only a laptop and charger
With a normal daily office load
At its recommended capacity
With travel items, if relevant
Check whether the front panel bulges, the base sags, the top collapses, or the side profile becomes too thick.
Test It With Work Clothing
Have different users wear the sample with:
A shirt
A blazer
A light jacket
A winter coat
Business-casual clothing
Review the scale, strap appearance, clothing friction, and how easily the backpack can be removed.
Test Carrying Transitions
Check:
Wearing it on both shoulders
Carrying it by the top handle
Placing it beside a meeting table
Setting it on an office floor
Removing a laptop at security
Sliding it onto luggage
Accessing a phone or travel document while standing
Review Color and Finish Under Different Light
Office lighting, daylight, photography lighting, and retail lighting can make fabric and metal finishes look different.
Check whether the material appears too shiny, whether colors remain consistent, and whether the hardware feels coordinated.
Compare It With the Design Brief and Cost Target
The final question is not simply whether the sample looks attractive.
Ask:
Does it fit the intended workplace?
Does it suit the target user’s clothing?
Does it maintain the intended silhouette when loaded?
Are the most important functions easy to use?
Does it look appropriate for the target retail price?
Does the construction align with the target sourcing cost?
Can the design be produced consistently?
A sample may look professional but still require cost adjustment. The goal is to simplify intelligently without removing the features that define the product.
Common Business Backpack Design Mistakes
Adding Too Many Visible Features
A product may contain many useful ideas but still look unprofessional when every pocket, zipper, buckle, and material change is displayed on the exterior.
Designing Only From the Front View
The front may look clean while the side becomes bulky, the top collapses, or the back panel appears too athletic. Business backpack design must be evaluated from every angle.
Treating Black as the Entire Design Strategy
Black can hide inconsistent decisions, but it cannot fix poor proportions, cheap-looking hardware, excessive seams, or a collapsing structure.
Using Leather or Metal as a Shortcut to Premium
A small leather patch or metal plate does not automatically make a backpack premium. Materials and hardware need to be integrated into the entire product.
Designing Without a Clear Cost Target
Premium fabric, custom hardware, complex compartments, hidden pockets, custom lining, and molded components may create a strong concept but also produce a sample the market cannot support.
Reducing Quality Evenly to Lower the Price
Replacing every material with a cheaper alternative can weaken the whole product. A better approach is to protect essential and brand-defining details while simplifying lower-value features.
Adding Organization Without Considering Volume
Every interior pocket uses space. Dense organizers can push the exterior outward and reduce the usable capacity of the main compartment.
Ignoring the Loaded Shape
A backpack may photograph well when filled with tissue paper but perform differently with a laptop, charger, bottle, and documents.
Making the Shoulder System Too Sporty
Thick contrast mesh, exposed webbing, aggressive shaping, and oversized components can conflict with an otherwise refined exterior.
Using Too Many Material Finishes
Combining glossy PU, matte fabric, bright metal, rubber, mesh, and contrast webbing can make the product feel fragmented.
Moving Into Pattern Development Too Early
Starting pattern development before the visual direction is resolved can turn simple visual changes into expensive structural revisions.
Treating the First Sample as the Final Product
The first prototype should reveal design problems. Expecting immediate perfection can lead teams to approve unresolved details or make rushed corrections during bulk production.
A Design Checklist for Brands Before Sampling
Before moving into sample development, confirm:
Market and Positioning
Target user
Work environment
Dress code
Main use scenario
Retail price position
Brand personality
Sales market
Price and Cost Direction
Target retail price
Main sales channel
Target sourcing cost
Essential functions
Brand-defining details
Optional upgrades
Acceptable material alternatives
Acceptable hardware alternatives
Preliminary cost review before pattern-making
Shape and Capacity
Target capacity
External dimensions
Height-to-width relationship
Side depth
Top shape
Base structure
Loaded silhouette
Exterior Design
Panel layout
Visible seam count
Pocket openings
Bottle-pocket treatment
Handle shape
Trolley sleeve
Back-panel appearance
Shoulder-strap profile
Design Draft
Initial concept sketch
Front, side, and back views
Top or opening view where necessary
Adobe Illustrator design draft
Alternative proportion studies
Panel and zipper-line review
Material and color combinations
Hardware placement
Logo scale and position
File revision number and date
Materials and Color
Main fabric
Lining
Reinforcement
Foam
Webbing
Mesh
Color references
Surface sheen
Material transitions
Hardware and Branding
Zipper type
Puller shape
Hardware finish
Buckles and adjusters
Logo method
Logo size and position
Interior branding
Finish consistency
Function
Laptop dimensions
Tablet storage
Documents
Charger organization
Quick-access items
Bottle storage
Security pocket
Travel requirements
Carrying comfort
Sample Evaluation
Empty shape
Loaded shape
Clothing compatibility
Access and organization
Strap comfort
Handle comfort
Color under different lighting
Sample-to-design consistency
Alignment with the target sourcing cost
Production feasibility
From Design Direction to a Production-Ready Sample
For brands developing business bag collections, an attractive front-view rendering is only the beginning.
The manufacturing team also needs to understand the target user, dimensions, capacity, laptop requirements, materials, colors, hardware, logo treatment, internal organization, comfort expectations, retail position, and target sourcing cost.
An Adobe Illustrator design draft can help the brand and development team settle the visual direction before pattern-making begins. A preliminary cost review should then confirm whether the selected structure, materials, hardware, and custom details are realistic for the project.
Vancharli Outdoor supports business backpack development from concept review and visual-draft evaluation through pattern-making, material and hardware selection, prototype sampling, target-cost optimization, sample revisions, and bulk-production preparation.
Rather than simply reproducing a drawing, the development team reviews how the silhouette, laptop compartment, pocket structure, carrying system, materials, and manufacturing method work together.
When a concept exceeds the target cost, the project can be reviewed through practical alternatives such as simplifying panel construction, replacing custom hardware with reliable standard components, adjusting material combinations, or retaining one strong brand-defining detail instead of several expensive custom features.
For products with a stronger technology or commuter focus, experience with custom laptop backpacks is particularly important because the computer compartment, back panel, shoulder straps, organization, loaded shape, and construction cost need to be developed as one system.
The goal is not to make every backpack look the same or to remove every higher-cost detail. It is to translate the intended brand position into a product that looks controlled, works in real business settings, fits the commercial target, and can be manufactured consistently.
Final Thoughts
A professional-looking business backpack is not created by choosing black fabric, adding a laptop sleeve, and placing a metal logo on the front.
Professional appearance comes from the relationship between silhouette, proportions, panel lines, materials, color, hardware, branding, organization, comfort, loaded shape, and price position.
Start with the user and workplace. Define the market position, sales channel, and target sourcing cost before the design becomes difficult to change. Choose a capacity that fits the real carrying load. Control the side depth and external pocket volume. Use seams only where they support structure or function.
Select materials and hardware that belong to the same visual level, but do not assume the most expensive option is always the right one. Protect the features that matter most to the user and the brand, then simplify details that add cost without enough practical or visual value.
Before pattern-making begins, use sketches and an Adobe Illustrator design draft to compare proportions, simplify visible lines, review every side of the backpack, and test different material, color, hardware, and logo directions.
Then test the physical sample in real business situations. Load it with actual equipment, wear it with work clothing, carry it by the handle, place it beside a meeting table, and observe how the shape changes.
The strongest business backpack designs do not choose between professionalism, function, and commercial viability. They make all three work together.
Brands preparing a new business backpack concept can discuss the intended market, design direction, materials, target cost, and sampling requirements with the Vancharli Outdoor development team before pattern-making begins.
FAQ
What makes a backpack look professional rather than casual?
A professional backpack normally has a controlled silhouette, balanced proportions, limited visible seams, refined materials, coordinated hardware, restrained branding, and exterior pockets that do not create unnecessary bulk.
Does a business backpack have to be black?
No. Navy, charcoal, dark brown, deep olive, taupe, and other muted colors can also look professional. Material texture, surface finish, hardware, and color consistency matter as much as the color itself.
How does the target price affect business backpack design?
The target retail position and sourcing cost affect material selection, compartment structure, hardware, padding, branding methods, and customization depth. Brands should identify essential, brand-defining, and optional features before sampling.
What capacity works well for an office backpack?
Many daily office backpacks fall around 18–24 liters, while slimmer executive designs may be smaller and business-travel models may be larger. The correct capacity depends on the laptop, documents, accessories, clothing, and travel requirements.
Can a nylon backpack look professional?
Yes. Nylon can look refined when the weave, texture, sheen, color, structure, and hardware are selected for an office environment. A professional business backpack does not have to use leather.
How many exterior pockets should a professional backpack have?
There is no fixed number. The exterior should provide enough quick access without creating a layered or bulky appearance. Several concealed pockets may look cleaner than one large protruding front compartment.
Should a business backpack include a bottle pocket?
It depends on the target user. For a cleaner exterior, the bottle pocket can be zippered, fold-flat, made from the main material, or placed inside the bag instead of using exposed elastic mesh.
How prominent should the logo be?
The logo should be visible enough to support brand recognition without dominating the front panel. Its size, contrast, material, and placement should fit the product’s price level and intended work environment.
What should an Adobe Illustrator design draft show?
It should show the front, side, and back views, major proportions, panel lines, pocket openings, zipper paths, handles, shoulder straps, material transitions, hardware placement, and logo position.
Is an Adobe Illustrator draft the same as a technical pattern?
No. The design draft communicates the visual direction and major proportions. The pattern maker still needs to translate it into physical pattern pieces, seam allowances, foam, lining, reinforcement, and an assembly structure.
How should a brand evaluate the first backpack sample?
Evaluate it empty and loaded, wear it with office clothing, test the laptop compartment and pockets, inspect the shape from every angle, review comfort, check materials and hardware under different lighting, and confirm that the construction still aligns with the target sourcing cost.







Comments are closed